20 - Service
Example 1
<service android:name=".MyService" android:exported="false"/>
bu
service diğer uygulamaların erişimesini istemediğim için service element'in
exported attribute'ünü false yaparım.
activity_main.xml
main layout olan activity_main.xml dosyasında 2 tane buton tanımlarım, ekranda 2 tane buton gösterilir böylece. Bu butonlardan üsttekine tıklayınca, activity class'ında tanımlı startService() method'u çağırılır, alttaki butona tıklayınca activity class'ında tanımlı stopService() method'u çağırılır.
<?xml version="1.0" encoding="utf-8"?>

<RelativeLayout xmlns:android="http://schemas.android.com/apk/res/android"

    xmlns:tools="http://schemas.android.com/tools" tools:context=".MainActivity">


    <Button

        android:layout_width="wrap_content"

        android:layout_height="wrap_content"

        android:id="@+id/button2"

        android:text="Start Services"

        android:onClick="startService"

        android:layout_below="@+id/imageButton"

        android:layout_centerHorizontal="true" />


    <Button

        android:layout_width="wrap_content"

        android:layout_height="wrap_content"

        android:text="Stop Services"

        android:id="@+id/button"

        android:onClick="stopService"

        android:layout_below="@+id/button2"

        android:layout_alignLeft="@+id/button2"

        android:layout_alignStart="@+id/button2"

        android:layout_alignRight="@+id/button2"

        android:layout_alignEnd="@+id/button2" />

</RelativeLayout>
MainActivity.java
Activity class'ında main layout'u set ederiz setContentView method'unu çağırarak. Ayrıca butona tıklayınca çağırılacak olan startService() ve stopService() method'larını implement ederiz. startService() ve stopService() method'larında bir intent object yaratılır sonra bu intent object sırasıyla startService() ve stopService() method'larına argument olarak verilir.
Activity class'ında main layout'u set ederiz setContentView method'unu çağırarak. Ayrıca butona tıklayınca çağırılacak olan startService() ve stopService() method'larını implement ederiz. startService() ve stopService() method'larında bir intent object yaratılır sonra bu intent object sırasıyla startService() ve stopService() method'larına argument olarak verilir.
startService() method'u
çağırıldığında, yaratılan intent object MyService isimli service class'ına
verilir. Service ilk kez yaratılacaksa, onCreate() method'u
çağırılır bu method çağırıldığında service yaratılmış olur. Sonra onStartCommand() method'u
çağırılır, bu method çağırılınca service başlatılmış olur. Yani start service
butonuna ilk kez tıkladığımızda sırayla onCreate()
ve onStartCommand() method'ları
çağırılır, artık service çalışmaktadır, bu butona tekrar tıklarsak, service
zaten çalışmakta olduğu için onCreate() method'u
çağırılmayacaktır, sadece onStartCommand() method'u
çağırılacaktır.
stopService() method'u
çağırıldığında, yaratılan intent object MyService isimli service class'ına
verilir. MyService class'ının onDestroy() method'u
çağırılarak service yok edilir.
public class MainActivity extends AppCompatActivity
{
@Override
protected void onCreate(Bundle savedInstanceState) {
super.onCreate(savedInstanceState);
setContentView(R.layout.activity_main);
}
public void startService(View view) {
startService(new Intent(getBaseContext(), MyService.class));
}
// Method to stop the service
public void stopService(View view) {
stopService(new Intent(getBaseContext(), MyService.class));
}
}
MyService:
Service class'ının da yaşam döngüsü method'ları vardır. Bu method'lardan ihtiyacımız olanları implement ederiz. Aşağıdaki örnekte Service class'ını extend ettiğimiz için onCreate(), onStartCommand() ve onDestroy() method'larını implement ettik. Service yaratılırken onCreate() method'u çağırılır. Service başlatılacağı zaman onStartCommand() method'u çağırılır. Service yok edileceği zaman onDestroy() method'u çağırılır. Bu method'lar çağırıldığı zaman toast mesajı gösterilir ekranda, bu sayede butonlara bastığımızda hangi method'ların çağırıldığını deneyerek uygulayarak gözlemleyebiliriz.
Eğer start service butonuna tıkladığımızda service'in yaratılıp başlatıldıktan sonra otomatik olarak yok edilmesini istiyorsak, onStartCommand() method'unda stopSelf() method'unu çağırmalıyız. stopSelf() method'u çağırıldığında service class'ında tanımladığımız onDestroy() method'u çağırılarak service yok edilir. Bu durumda onStartCommand method'u şöyle olmalı :
@Override

public int onStartCommand(Intent intent, int flags, int startId) {

    Toast.makeText(this, "Service is started", Toast.LENGTH_LONG).show();

    stopSelf();

    return super.onStartCommand(intent, flags, startId);

}
public class MyService extends Service {


    @Override

    public IBinder onBind(Intent intent) {

        return null;

    }


    @Override

    public void onCreate() {

        super.onCreate();

        Toast.makeText(this, "Service is created", Toast.LENGTH_LONG).show();

    }


    @Override

    public int onStartCommand(Intent intent, int flags, int startId) {

        // Let it continue running until it is stopped.

        Toast.makeText(this, "Service is started", Toast.LENGTH_LONG).show();

        return super.onStartCommand(intent, flags, startId);

    }


    @Override

    public void onDestroy() {

        super.onDestroy();

        Toast.makeText(this, "Service is destroyed", Toast.LENGTH_LONG).show();

    }

}
AndroidManifest.xml
<?xml version="1.0" encoding="utf-8"?>

<manifest xmlns:android="http://schemas.android.com/apk/res/android"

    package="oiyioz.com.serviceexample1">


    <application

        android:allowBackup="true"

        android:icon="@mipmap/ic_launcher"

        android:label="@string/app_name"

        android:supportsRtl="true"

        android:theme="@style/AppTheme">

        <activity android:name=".MainActivity">

            <intent-filter>

                <action android:name="android.intent.action.MAIN" />

                <category android:name="android.intent.category.LAUNCHER" />

            </intent-filter>

        </activity>


        <service
android:name=".MyService"
android:exported="false"
/>
    </application>

</manifest>
Output :
Uygulama
başlatıldığında aşağıdaki ekran gösterilir.

Start service
butonunailk kez tıklayınca sırayla service yaratıldı ve başlatıldı toast
mesajları gösterilir ekranda. Service başlatıldıktan sonra start service
butonuna tekrar tıklarsak service yaratıldı toast mesajınını görmeyiz, sadece
service başlatıldı toast mesajını görürüz ekranda.


Stop service
butonuna tıklayınca service class'ının onDestroy() method'u çağırılarak service
destroyed toast mesajı gösterilir ekranda.

Activity
class'ında intent object yaratıp bu intent'i service class'ına gönderiyoruz
uygulamamızda. Uygulamamızı geliştirmeye devam edelim. Şimdi intent object'de
bir variable tutalım:
i.putExtra("message","Are you okay ?");
startService(i); method'unu
çağırdığımızda intent object ile birlikte bu variable'ı da göndermiş oluruz service
class'a. Service class'da gelen intent object'de tutulan variable'ları elde
edip kullanabiliriz.
public class MainActivity extends AppCompatActivity {

    @Override

    protected void onCreate(Bundle savedInstanceState) {

        super.onCreate(savedInstanceState);

        setContentView(R.layout.activity_main);

    }


    public void startService(View view) {

        Intent i = new Intent(getBaseContext(), MyService.class);

        i.putExtra("message","Are you okay ?");

        startService(i);

    }
...
}
public class MyService extends Service {

    @Override

    public void onCreate() {

        super.onCreate();

        Toast.makeText(this, "Service is created", Toast.LENGTH_LONG).show();

    }


    @Override

    public int onStartCommand(Intent intent, int flags, int startId) {

        // Let it continue running until it is stopped.

        Toast.makeText(this, "Service is started", Toast.LENGTH_LONG).show();

        String msg = intent.getStringExtra("message");

        Toast.makeText(this, "Message received from activity via intent : " + msg , Toast.LENGTH_LONG).show();

        return super.onStartCommand(intent, flags, startId);

    }

Output
: Service'i başlattığımızda service yaratıldı ve başlatıldı toast
mesajlarından sonra şu toast mesajını görürürüz:

Bir service
class'ının nasıl tanımlanacağını basit bir örnek ile gördük. Eğer yoğun
işlemlerin yapılacağı bir servis class yazacaksak, örneğin büyük bir dosya
indirecek bir service class yazacaksak bu örnekteki gibi Service class'Inı
extend eden bir class yazmamalıyız. Çünkü yukarıdaki örnekteki service'in
çeşidi Started Service'dir, bu service
çeşidi main thread'de çalışır, ayrı bir thread'de arka planda çalışmaz.
Bizim istediğimiiz
ayrı bir thread'de arka planda çalışan bir service ise, Started Service çeşidi
bizim ihtiyacımızı karşılamaz. IntentService class'ını extend eden bir class
tanımlamalıyız.
Service ve
IntentService arasındaki farklardan birisi şudur, service class'ını extend bir service
tanımlarsak bu service manual olarak yok edilmelidir onDestroy() veya selfDestroy()
method'larından birisi çağırılarak. Ancak IntentService'i extend eden bir
service tanımlarsak, bu service manual olarak değil otomatik olarak destroy
edilir, yani yapılacak işlemler arka planda tamamlandıktan sonra service'in
onDestroy() method'u otomatik olarak çağırılarak service yok edilir.
Ayrıca, intent ile
ilgili işlemleri Intent Service class'ının onHandleIntent() method'unda
yaparız.
Tanımlayacağımız
yeni service class'ı aşağıdadır :
public class SecondService extends IntentService {


    public SecondService(){

        super("My Bound Service");

    }


    @Override

    public void onCreate() {

        super.onCreate();

        Toast.makeText(this, "Second Service is created", Toast.LENGTH_LONG).show();

    }


    @Override

    public int onStartCommand(Intent intent, int flags, int startId) {

        Toast.makeText(this, " Second Service is started", Toast.LENGTH_LONG).show();

        return super.onStartCommand(intent, flags, startId);

    }


    @Override

    protected void onHandleIntent(Intent intent) {

        Log.d("Service test","from the onHandleIntent method");

    }


    @Override

    public void onDestroy() {

      super.onDestroy();

      Toast.makeText(this," Second Service is destroyed!",Toast.LENGTH_LONG).show();

    }

}
bu class'ı manifest dosyasında belirtelim:
<service android:name=".SecondService" android:exported="false"/>
Main layout'a bir
buton daha koyalım :
<Button

    android:text="Start Second Service"

    android:id="@+id/button3"

    android:onClick="startSecondService"

    ... />
MainActivity
class'ında startBoundedService isimli bir
method tanımlayalım:
public void startSecondService(View view) {

    Intent i = new Intent(getBaseContext(), SecondService.class);

    i.putExtra("message","Message sent to Bounded service !");

    startService(i);

}
Output : Uygulamayı
başlattığımızda aşağıdaki gibi 3 tane buton gösterilir ekranda. Start Second
Services method'una tıklarsak, SecondService isimli Service otomatik olarak
yaratılır, başlatılır ve yok edilir.

Started service ve
Bounded Service arasındaki farkı iyice kavradıktan sonra yukarıdaki örneği
tekrar gözden geçir vegerekli düzeltmeleri yap.
Note: Android service is not a thread
or separate process
Life Cycle of
Android Service
There can be two
forms of a service.The lifecycle of service can follow two different paths:
started or bound. ( 2 çeşit service vardır: Started service ve Bounded service.
Started service ve Bounded service'in farklı yaşam döngüleri farklıdır. )
- Started
- Bound
3. Scheduled : bu service
çeşidini şimdilik atlayacağız.
1) Started Service
A service is started
when component (like activity) calls startService() method, now it runs in the background indefinitely. It is stopped
by stopService() method. The service can
stop itself by calling the stopSelf() method. ( Bir component mesela activity, startService() method'unu çağırdığında started service çeşinde bir service
başlatılır. Artık bu service'i başlatan activity yok edilse bile bu service
arka planda çalışmaya devam eder. stopService() veya stopSelf() method'larından
biri çağırılarak service durdurulur, veya intentService class'Inı extend eden
bir service tanımlayıp bu service'i startService() method'Unu çağırarak
başlatırsak, bu service işi bitince otomatik olarak yok edilir. )
Örneğin bir started
service başlatıp bu service'in bir müzeik çalmasını sağlayabiliriz, artık bu
service'i başlatan activity'yi kapatsak bile arka planda çalışan service,
müziğin çalışmaya devam etmesini sağlar.
2) Bound Service
A service is bound
when another component (e.g. client) calls bindService() method. The client can
unbind the service by calling the unbindService() method. ( Bir component mesela activity, d-bindService() method'unu çağırdığında bound service çeşinde bir service
başlatılır, diğer bir deyişle client'a bağlanır. Client bu service'den ayrılmak
için unbindService() method'unu çağırır.
The service cannot be
stopped until all clients unbind the service. (Bounded
service'in durdurulması için, Bound service'e bağlanmış olan tüm
client'ların service'den ayrılmış olması zorunludur.)
Started service ve
Bounded service'in yaşam döngüleri aşağıda gösterilmiştir, inceleyelim...

Explanation
from the official Android tutorial
https://developer.android.com/guide/components/services.html
A Service is an application component
that can perform long-running operations in the background, and it does not
provide a user interface. Another application component can start a service,
and it continues to run in the background even if the user switches to another
application. ( Service, arka planda uzun süren
işlemleri gerçekleştiren bir uygulama bileşenidir. Bir service'in user
interface'i yoktur. Başka bir uygulama bileşeni, örneğin activity veya
fragment, bir service'i başlatabilir, service arka planda çalışmaya başlar,
artık bu service'i başlatan activity veya fragment yok edilse bile service
çalışmaya devam eder. )
Additionally,
a component can bind to a service to interact with it and even perform
interprocess communication (IPC). For example, a service can handle network
transactions, play music, perform file I/O, or interact with a content
provider, all from the background.
These are the three different types of services:
1. Scheduled service
A
service is scheduled when an API such as the JobScheduler, introduced in Android 5.0 (API
level 21), launches the service. You can use the JobScheduler by registering jobs and
specifying their requirements for network and timing. The system then
gracefully schedules the jobs for execution at the appropriate times. The JobScheduler provides many methods to
define service-execution conditions. ( Scheduled
service'i, bir API, örneğin JobScheduler başlatır. JobScheduler Android 5.0 ile
birlikte gelmiştir. JobScheduler'ı kullanarak, işler kaydedebiliriz, bu işlerin
network ve zaman ayarlarını ayarlayabiliriz. Sistem kaydettiğimiz işleri
schedule eder(planlamasını çalışma sırasını ve zamanını ayarlar), ve işlerin
planlanan zamanda ve planlanan sırayla çalışmasını sağlar. Kaydedilen işlerin
çalışacağı zamanı sırası vs. gibi ayarları ayarlamak için, JobScheduler
class'ının içerdiği çok sayıda method vardır, bu method'ları
kullanabiliriz. )
Note: If your app targets Android 5.0 (API level
21), Google recommends that you use the JobScheduler to execute background
services. For more information about using this class, see the JobScheduler reference documentation.( Eğer uygulamanızı Android 5.0'da çalışacak şekilde
geliştiriyorsanız, arka planda çalışacak service'leri implement etmek için
JobScheduler class'ını kullanmamızı öneriri Google. )
2. Started service
A
service is started when an application component (such as an
activity) calls startService(). After
it's started, a service can run in the background indefinitely, even if the
component that started it is destroyed. Usually, a started service performs a
single operation and does not return a result to the caller. For example, it can
download or upload a file over the network. When the operation is complete, the
service should stop itself.
3. Bound service (Process'ler arası
haberleşmeyi sağlar.)

A
service is bound when an application component binds to it by
calling bindService(). A bound
service offers a client-server interface that allows components to interact
with the service, send requests, receive results, and even do so across
processes with interprocess communication (IPC). ( Bir component mesela activity, bindService() method'unu çağırdığında bound service
çeşinde bir service başlatılır, diğer bir deyişle service client'a bağlanır.
Client bu service'den ayrılmak için unbindService() method'unu çağırır. Bound
service, bize client server yapısını sağlar. Bir component(client)'i bir bound
service'e(server) bağladık diyelim, mesela bir activity'yi bound service'e
bağladık diyelim, bu durumda activity ve service arasında bir client service
yapısı kurmuş oluruz, interprocess communication yapısı kurmuş oluruz, activity
service'e request gönderir service'den gelen result'ı alır, böylece process'ler
arası haberleşmeyi sağlamış oluruz. )
A
bound service runs only as long as another application component is bound to
it. Multiple components can bind to the service at once, but when all of them
unbind, the service is destroyed. ( Bir bound
service'İn çalışabilmesi için, başka bir uygulama bileşeninin bu service'e
bağlanmış(bound) olması gerekir. Bir bound service'e, birden fazla component
bağlanabilir. Bir bound service'e bağlanan tüm component'ler service'den
ayrıldığında(unbind), service yok edilir. )
Although
this documentation generally discusses started and bound services separately,
your service can work both ways—it can be started (to run indefinitely) and
also allow binding. It's simply a matter of whether you implement a couple of
callback methods: onStartCommand() to
allow components to start it and onBind() to allow binding. ( Bu dökümanda started ve bounded service'leri ayrı ayrı
inceledik. Ancak her ikisini içeren bir service implement etmek de mümkündür,
bunun için onStartCommand() ve onBind() method'larını implement
etmeliyiz. component'lerin service başlatması için onStartCommand() method'Unu,
binding'e izin vermek için onBind() method'unu implement ederiz diye anladım
ama emin değilim.)
Regardless
of whether your service is started, bound, or both, any application component
can use the service (even from a separate application) in the same way that any
component can use an activity—by starting it with an Intent. However, you can declare the
service as private in the manifest file and block access from
other applications. This is discussed more in the section about Declaring the service in the manifest. ( Service'iniz started veya bound veya her ikisi de olsa,
uygulamamızın tüm bileşenleri bu service kullanabilir, hatta eğer manifest
dosyasında gerekli izinleri verirsek, başka uygulamaların bileşenleri bile
service'imizi kullanabilir. Manifest dosyasında service'imizi private yaparak,
diğer uygulamaların service'imize erişmesini önleyebiliriz. )
Caution: A service runs in the main thread of its
hosting process; the service does not create its own thread
and does not run in a separate process unless you specify
otherwise. If your service is going to perform any CPU-intensive work or
blocking operations, such as MP3 playback or networking, you should create a
new thread within the service to complete that work. By using a separate
thread, you can reduce the risk of Application Not Responding (ANR) errors, and
the application's main thread can remain dedicated to user interaction with
your activities. ( Bir service, çalıştığı
process'in yani çalıştığı uygulamanın main thread'inde çalışır. Biz manual olarak
belirtmezsek, bir service, kendi thread'ini yaratmaz, ayrı bir process'de
çalışmaz. Eğer service'imiz, CPU'nun yoğun olarak çalışmasını gerektirecek
işler veya blocking işlemler yapacaksa, service'in içinde yeni bir thread
yaratmalıyız, yoğun işleri bu thread içerisinde yapmalıyız. Bu şekilde, CPU
intensive işler ve blocking işlemler için ayrı bir thread kullanırsak, ANR(
Application Not Responding) hatası olma riskini azaltırız. Uygulamanın main
thread'i bu işlerle uğraşmaz, kullanıcı ile etkileşimi sağlar, şu activity'den
şu activity'ye geç vs gibi işleri yapar sadece main thread bu sayede. )
Should you use a service or a thread?
A service is simply a component that can run in the
background, even when the user is not interacting with your application, so you
should create a service only if that is what you need. (
Bir service, arka planda çalışan bir uygulama bileşenidir. Kullanıcı
uygulamanızı kapatsa bile service’iniz arka planda çalışmaya devam edecektir.
Dolayısıyla sadece ihtiyacınız olduğunda kullanmalısınız service’i. )
If you
must perform work outside of your main thread, but only while the user is
interacting with your application, you should instead create a new thread. For
example, if you want to play some music, but only while your activity is
running, you might create a thread in onCreate(), start running it in onStart(), and stop it in onStop(). Also consider using AsyncTask or HandlerThread
instead
of the traditional Thread class.
See the Processes and Threading document for more information about threads. ( Eğer main thread’in dışında bir iş yapacaksak, ama
sadece kullanıcı bu uygulama ile etkileşimde bulunurken iş yapacaksak, yeni bir
thread yaratmalıyız. Örneğin, bir müzik çalmak istiyoruz diyelim, ama bu müziği
sadece activity’miz çalışırken çalmak istiyoruz diyelim, bu durumda
activity’mizin onCreate() method’unda bir thread yaratırız, onStart()
method’unda thread’I başlatırız, onStart() method’unda thread’I durduruz.
Ayrıca geleneksel Thread class’ını kullanmaktansa, AsyncTask veya HandlerThread class’ını kullanmak daha
evladır aslında. )
Remember that if you do use a service,
it still runs in your application's main thread by default, so you should still
create a new thread within the service if it performs intensive or blocking
operations. ( Şunu hatırlayalım ki, service default
olarak uygulamanın main thread’inde çalışır. Dolayısıyla CPU intensive bir iş
yapacaksak, yeni bir thread yaratıp işimizi bu thread’de yapmalıyız. )
The basics
To create
a service, you must create a subclass of Service or use one of its existing subclasses. In your implementation, you must
override some callback methods that handle key aspects of the service lifecycle
and provide a mechanism that allows the components to bind to the service, if
appropriate. These are the most important callback methods that you should
override: ( Service yaratmak için, Service class’ından veya Service
class’ının subclass’larının birini extend eden bir class tanımlarız. Gerekli
yaşam döngüsü method’larını override ederiz. İhtiyamız varsa, component’ların
service’e bağlanmasını sağlamak için onBind() method’unu implement ederiz. )
The
system invokes this method by calling startService() when
another component (such as an activity) requests that the service be started.
When onStartCommand() method executes, the service is started and can run in
the background indefinitely. If you implement this, it is your responsibility
to stop the service when its work is complete by calling stopSelf() or stopService(). If you only want to provide
binding, you don't need to implement this method. ( Bir
component örneğin bir activity, service’İ başlatmak için startService()
method’Unu çağırınca, sistem onStartCommand() method’unu çağırır.
onStartCommand() method’u çağırıldığında, service arka planda çalışmaya başlar.
Eğer onStartCommand() method’unu implement edersek, service’imizi durdurmak
için stopSelf() veya stopService() method’unu çağırmak bizim sorumluluğumuz
olur. Eğer sadece bir component’in bir service’e bağlanmasını(binding)
istiyorsak, onStartCommand() method’unu implement etmemize gerek yoktur. )
The
system invokes this method by calling bindService() when
another component wants to bind with the service (such as to perform RPC). In
your implementation of this method, you must provide an interface that clients
use to communicate with the service by returning an IBinder. You must always implement this method;
however, if you don't want to allow binding, you should return null.
(bindService() method’unu çağırarak bir component bir service’e
bağlanırsa(bind), system onBind() method’Unu çağırır. onBind() method’unun
implementation’ında, client’ın service ile iletişim kurmak için kullanacağı bir
interface sağlamak zorundayız, bunun için IBinder return etmeliyiz. Bu method’u
genellikle implement ederiz, ancak binding’e izin vermek istemiyorsak bu
method’un sadece null return etmesi yeterli olacaktır. )
The
system invokes this method to perform one-time setup procedures when the
service is initially created (before it calls either onStartCommand() or onBind()). If the service is already running, this
method is not called. ( Service ilk olarak yaratılırken,
system Service class’ının onCreate() method’unu çağırır. Service zaten
çalışmaktaysa onCreate() method’u bir daha çağırılmaz. )
The
system invokes this method when the service is no longer used and is being
destroyed. Your service should implement this to clean up any resources such as
threads, registered listeners, or receivers. This is the last call that the
service receives. ( Thread’ler, listener’lar veya
receiver’lar gibi kaynakları temizlemek free etmek boşaltmak için Service
class’ının onDestroy() method’u implement edilmelidir. )
If
a component starts the service by calling startService() (which
results in a call to onStartCommand()), the service continues to run
until it stops itself with stopSelf() or another
component stops it by calling stopService().( Eğer bir
service, startService() method’u çağırılarak başlatılmışsa, sistem
onStartCommand() method’Unu çağırır, ve stopSelf() veya stopService()
method’unu çağırana kadar service çalışmaya devam eder. )
If
a component calls bindService() to create
the service and onStartCommand() is not called,
the service runs only as long as the component is bound to it. After the
service is unbound from all of its clients, the system destroys it.
( Eğer bir service, bindService() method’u çağırılarak başlatılmışsa, ve
onStartCommand() method’u implement edilmezse çağırılmazsa, service kendisine
bağlı client olduğu müddetçe çalışmaya devam eder. )
The
Android system force-stops a service only when memory is low and it must
recover system resources for the activity that has user focus. (
Sadece memory’nin az olduğu durumlarda Android sistemi service’i zorla
durdurur. Çünkü Android sistemi kullanıcının uygulama ile etkileşimini
sürdürebilmesi için memory’yi boşaltmak zorundadır.)
If the
service is bound to an activity that has user focus, it's less likely to be
killed; if the service is declared to run
in the foreground, it's rarely killed. (Service,
foreground’da çalışıyorsa service’in kill edilmesi çok nadiren olur. Running
state’deki bir activity’ye bind edilen bir servisin sistem tarafından kill
edilmesi çok nadiren olur. )
If the service is started and is long-running,
the system lowers its position in the list of background tasks over time, and
the service becomes highly susceptible to killing—if your service is started,
you must design it to gracefully handle restarts by the system. If the system
kills your service, it restarts it as soon as resources become available, but
this also depends on the value that you return from onStartCommand(). For more information about when
the system might destroy a service, see the Processes
and Threading document.
( Eğer started service kullanıyorsak, ve service’de uzun sürecek bir iş
yapıyorsak, sistem arka planda çalışan task’lar listesinde service’in
pozisyonunu düşürür. Service öldürülmeye kill edilmeye yaklaşır artık. Eğer
service’imiz started service ise, service’imizi restart’ları da handle edecek
şekilde geliştirmeliyiz, yani sistem servisimizi memory’de kaynak açmak için
restart ederse servisimizde veri kaybetmemeliyiz. Sistem servisimizi kill
ederse, yeterli kaynak available olur olmaz servisimizi tekrar başlatacaktır,
ancak bu onStartCommand() method’unun return ettiği değere bağlıdır. Sistemin
bir service’i ne zaman destroy edeceği ile ilgili daha fazla bilgi için ilgili
url’i okumalıyız. )
Declaring
a service in the manifest
You
must declare all services in your application's manifest file, just as you do
for activities and other components.
To
declare your service, add a
<service> element as a child of the <application> element. Here is an example:
<manifest ... >
...
<application ... >
<service android:name=".ExampleService" />
...
</application>
</manifest>
...
<application ... >
<service android:name=".ExampleService" />
...
</application>
</manifest>
There
are other attributes that you can include in the
<service> element to define properties such
as the permissions that are required to start the service and the process in
which the service should run. ( service
element’inde başka attribute’ler de vardır, bu attribute’leri kullanarak
service’i başlatmak için gerekli izinleri tanımlayabiliriz. Service’in hangi
process’in içinde çalışacağını belirtebiliriz. )
The
android:name attribute is the only required
attribute—it specifies the class name of the service. After you publish your
application, leave this name unchanged to avoid the risk of breaking code due
to dependence on explicit intents to start or bind the service (read the blog
post, Things
That Cannot Change). ( service element’inin zorunlu
olan tek attribute’ü android:name ‘dir. android:name, service class’ının ismini
belirtir. Uygulamamızı publish ettikten sonra, android:name attribute’Ünün
değerini artık değiştirmemeliyiz, service’i başlatmak için expilict intent’lere
bağımlılık varsa, ve android:name attribute’ünü değiştirirsek kodumuz bozulur. )
Caution: To
ensure that your app is secure, always use an explicit intent when starting a Service and do not
declare intent filters for your services. Using an implicit intent to start a
service is a security hazard because you cannot be certain of the service that
will respond to the intent, and the user cannot see which service starts.
Beginning with Android 5.0 (API level 21), the system throws an exception if
you call bindService() with an
implicit intent. ( Bir service başlatırken, explicit
intent kullanmalıyız ve service’imiz için intent filter kullanmamalıyız. Aksi
takdirde uygulamamızda güvenlik açığı olur. Bir service’i implicit intent
kullanarak başlatmak güvenlik açığıdır çünkü intent’e cevap verecek service’i
bilemeyiz, kullanıcı hangi service’in başladığını göremez. Android 5.0’dan
itibaren, eğer bindService() method’unu implicit intent ile çağırırsak
exception throw edilir. )
You
can ensure that your service is available to only your app by including the
android:exported attribute and setting it to false. This effectively stops other apps from starting
your service, even when using an explicit intent. (
Servisinizi sadece kendi uygulamanızda kullanmak istiyorsanız, android:exported attribute’’ünü
false olarak set edin. Bu sayede diğer uygulamaların service’inizi başlatmasını
engellemiş olursunuz. )
Note: Users
can see what services are running on their device. If they see a service that
they don't recognize or trust, they can stop the service. In order to avoid
having your service stopped accidentally by users, you need to add the
android:description attribute to the <service>
element
in your app manifest. In the description, provide a short sentence explaining
what the service does and what benefits it provides.
( Kullanıcılar telefonlarında hangi service’lerin çalıştığını görebilir.
Tanımadıkları veya güvenmedikleri bir service’i durdurabilirler. Service’inizin
kullanıcılar tarafından yanlışlıkla
durdurulmasını önlemek istiyorsanız, Manifest dosyasında service element’ine
android:description attribute’ünü eklersiniz, android:description attribute’üne
kısa bir cümle assign ederiz, bu cümlede service’in ne yaptığını ne işe
yaradığını açıklarız. Service’i durdurmaya çalıştığımızda bu açıklamayı içeren
bir diyalog gösterilir kullanıcıya servisi kapatmak istediğinize emin misiniz
diye sorulur, bu sayede kullanıcı önemli bir servisi kapatmaktan vazgeçirilir. )
Creating
a started service
A
started service is a service that another component starts by calling startService(), which results in a call to the
service's onStartCommand() method. ( Bir component'in startService() method'Unu çağırmasıyla started service başlatılır,
sonrasında ise otomatik olarak onStartCommand() method'u çağırılır. )
When
a service is started, it has a lifecycle that's independent of the component
that started it. The service can run in the background indefinitely, even if
the component that started it is destroyed. As such, the service should stop
itself when its job is complete by calling stopSelf(), or another component can stop it
by calling stopService().( Bir
service başlatıldığında, kendisine ait bir yaşam döngüsüne sahip olur.
Service'i başlatan component yok olsa bile, service arka planda çalışmaya devam
eder. )
An
application component such as an activity can start the service by calling startService() and
passing an Intent that
specifies the service and includes any data for the service to use. The service
receives this Intent in
the onStartCommand() method. ( Örneğin bir activity startService() method'una bir intent object vererek bu method'u
çağırır. Intent object ile herhangibir veri de gönderebilir activity service'e.
Service, bu intent object'i onStartCommand() method'unda alır. )
For
instance, suppose an activity needs to save some data to an online database.
The activity can start a companion service and deliver it the data to save by
passing an intent to startService(). The service receives the intent
in onStartCommand(), connects to the Internet, and
performs the database transaction. When the transaction is complete, the service
stops itself and is destroyed. ( Örneğin bir
activity, bazı verileri online veritabanına kaydetmek istiyor diyelim. Bu
durumda bu verileri bir intent object'e koyar, ve bu intent object'i
startService() method'una argument olarak vererek bir service başlatır. Intent
object'i onStartCommand() method'unda alan service, internet'e bağlanır,
veritabanına verileri kaydeder. İşlem tamamlanınca service kendisini durdurur
ve yok eder. )
Caution: A service runs in the same
process as the application in which it is declared and in the main thread of
that application by default. If your service performs intensive or blocking
operations while the user interacts with an activity from the same application,
the service slows down activity performance. To avoid impacting application
performance, start a new thread inside the service.
( Service, declare edildiği uygulama ile aynı process'de çalışır default
olarak. Declare edildiği uygulamanını main thread'İnde çalışır default olarak.
Kullanıcı aynı uygulamadaki bir activity ile etkileşim halindeyken,
service'iniz intensive veya blocking operation'lar gerçekleştirecekse, bu
service yüzünden kullanıcının etkileşimde olduğu activty'nin performansı düşer.
Servisinizin uygulamanın performansını düşürmemesini istiyorsanız, service'inizin
içinde yeni bir thread başlatıp işlerinizi bu thread içinde yapmalısınız. )
Traditionally,
there are two classes you can extend to create a started service: ( Genellikle, Service veya IntentService class'ını
extend eden bir class tanımlarız. )
Service
This
is the base class for all services. When you extend this class, it's important
to create a new thread in which the service can complete all of its work; the
service uses your application's main thread by default, which can slow the
performance of any activity that your application is running. ( Tüm service'lerin parent class'ıdır. Bu class'ı extend
eden bir class tanımlarsak, service'in içinde bir thread yaratıp işlerimizi
thread içinde yapmalıyız. Service default olarak uygulamanızın man thread'ini
kullanır, bu da uygulamanızda tüm activity'lerin performansını düşürür. )
IntentService
This
is a subclass of Service that
uses a worker thread to handle all of the start requests, one at a time. This
is the best option if you don't require that your service handle multiple
requests simultaneously. ( IntentService
class'ından bir service yaratmak istediğimizde, sistem otomatik olarak bir
worker thread yaratıp tüm işleri bu worker thread'de yapar. Yani yukarıda
Service class'ındaki gibi, service'imizin içinde manual olarak bir thread
yaratmamıza gerek yoktur, intentService class'ı bu işi otomatik olarak yapar.
Herbir yaratılan servis ayrı bir worker thread'de handle edilir. Eğer
service'inizin aynı anda birden fazla servis yaratma isteğini handle etmesi
gibi bir gereksiniminiz yoksa, IntentService class'ını kullanmak en iyi yoldur,
aynı anda birden fazla servis yaratmaya neden ihtiyacım olsun anlamadım ama. )
Implement onHandleIntent(), which receives the intent for
each start request so that you can complete the background work. ( Service'e gelen intent object, onHandleIntent()
method'unda elde edilir, dolayısıyla arka planda yapmak istediğimiz işleri bu
method içerisinde yapmalıyız. )
The
following sections describe how you can implement your service using either one
for these classes. ( Şimdi ise Service ve
IntentService class'larını extend ederek bir class implement etmeyi
öğreneceğiz. )
Extending the
IntentService class
Because most of the started services
don't need to handle multiple requests simultaneously (which can actually be a
dangerous multi-threading scenario), it's best that you implement your service
using the IntentService class. (Çoğu durumda, started service'lerin aynı anda birden fazla
servis yaratma isteğini handle etmesi gibi bir gereksinim yoktur, bu tehlikeli
bir multithreading senaryosudur. Bu durumda IntentService class'ını kullanmak
en iyi yoldur. )
·
It creates a default worker thread
that executes all of the intents that are delivered to onStartCommand(), separate from your application's
main thread. ( Default bir worker thread yaratır,
onStartCommand() method'una gelen intent'leri bu worker thread çalıştırır,
worker thread uygulamanın main thread'inden tamamen ayrı olarak çalışır. )
·
Work
requests run sequentially. If an operation is running in an IntentService, and you send it
another request, the request waits until the first operation is finished.
·
Creates a work queue that passes
one intent at a time to your onHandleIntent() implementation,
so you never have to worry about multi-threading. (
onHandleIntent() methoula gelen intent object'ler bir kuyruğa girerker, bu
intent object'ler ile ilgili işler sırayla yapılır. Yani multithreading
konusunda endişelenmemize gerek kalmaz, service'e art arda ve hatta aynı anda
request'ler gelse bile bu request'ler bir kuyruğa sokulup sırayla tek tek
handle edilir. )
·
Stops the service after all of the
start requests are handled, so you never have to call stopSelf().(
Service yaratma request'lerinin hepsi handle edildikten sonra otomatik olarak
stopSelf() method'u çağırılarak service durdurulur. )
·
Provides a default implementation
of onStartCommand() that
sends the intent to the work queue and then to your onHandleIntent()
implementation. (onStartCommand() method'unun default implementation'ı şöyledir,
bu method, kendisine gelen intent'i iş kuyruğuna gönderir sonra bu intent'i
onHandleIntent() method'una gönderir. )
·
IntentService
will receive the Intents, launch a worker thread, and stop the service as
appropriate. All requests are handled on a single worker thread -- they may
take as long as necessary (and will not block the application's main loop), but
only one request will be processed at a time.
To
complete the work that is provided by the client, implement onHandleIntent(). However, you also need to
provide a small constructor for the service. (
Service'i yaratan component bir activity ise, bu activity service'imizin
client'ıdır. Client''ın yani bu activity'nin işini tamamlamak için örneğin
activity'den gelen verileri bir online veritabanına kaydetmek gibi işleri onHandleIntent()
method'una yaparız. Bu yüzden onHandleIntent() method'unu implement etmeliyiz.
Ayrıca IntentService class'ının no-arg constructor'ını da implement etmek
zorunludur. Bu constructor'da, IntentService class'ının IntentService(String) cpnstructor'ını çağırırız, böylece intentservice için
yaratılacak olan worker thread'e bir isim vermiş oluruz. )
public class HelloIntentService extends IntentService {
/** A constructor is required, and must call the super IntentService(String) constructor with a name for the worker thread. (IntentService class'ı için bir constructor tanımlamak ve bu constructor'da IntentService(String) method'unu çağırmak zorunludur. IntentService(HelloIntentService) constructor'ını çağırarak worker thread'e HelloIntentService ismini vermiş olduk. ) */
public HelloIntentService() {
super("HelloIntentService");
}
/**The IntentService calls this method from the default worker thread with the intent that started the service. When this method returns, IntentService stops the service, as appropriate. ( Bu service için otomatik olarak yaratılmış olan worker thread onHandleIntent() method'unu çağırır. Service başlatılırken gelen intent, yani onStartCommand() method'u ile elde edilen intent argument olarak verilir onHandleIntent() method'Una. onHandleIntent() method'u return ettiğinde, service artık işini tamamlamıştır dolayısıyla service durdurulur. Arka planda yapmak istediğimiz işleri mesela veri indirmek müzik çalmak vs. gibi bu method'da yaparız. ) */
@Override
protected void onHandleIntent(Intent intent) {
// Normally we would do some work here, like download a file.
// For our sample, we just sleep for 5 seconds.
try {
Thread.sleep(5000);
} catch (InterruptedException e) {
// Restore interrupt status.
Thread.currentThread().interrupt();
}
}
}
If you
decide to also override other callback methods, such as onCreate(), onStartCommand(), or onDestroy(), be sure to call the super
implementation so that the IntentService can
properly handle the life of the worker thread. (IntentService'i
extend eden bir class'da, onCreate(),
onStartCommand(), veya onDestroy() callback
method'larını da implement etmek istersek, bu method'larda da super class'ın
ilgili method'larını da çağırmalıyız. Genellikle bu method'ları implement
etmemize sadeceonHandleIntent method'Unu ve constructor'ı implement etmek
yeterli olacatır, ancak onCreate(),
onStartCommand(), veya onDestroy() method'larını implement etmek istersek bu
method'larda superclass implementation'ları invoke etmeliyiz. Service class'ını
extend eden bir class yazarsak böyle bir zorunluluk yoktur, yani onCreate(), onStartCommand(), veya onDestroy() method'larını implement ederken bu method'larda super class
implementation'ları çağırmaya gerek yoktur. )
For
example, onStartCommand() must
return the default implementation, which is how the intent is delivered to onHandleIntent():( Örneğin
onStartCommand()
method'unu implement edersek, şunu return etmek zorundayız : super.onStartCommand(intent,flags,startId);
bu sayede intent
onHandleIntent() method'una gönderilir, çünkü super class'daki onStartCommand()
method'unun implementation'ı intent'i onHandleIntent() method'una gönderir. )
@Override
public int onStartCommand(Intent intent, int flags, int startId) {
Toast.makeText(this, "service starting", Toast.LENGTH_SHORT).show();
return super.onStartCommand(intent,flags,startId);
}
public int onStartCommand(Intent intent, int flags, int startId) {
Toast.makeText(this, "service starting", Toast.LENGTH_SHORT).show();
return super.onStartCommand(intent,flags,startId);
}
Besides onHandleIntent(), the only method from which you
don't need to call the super class is onBind(). You need to implement this only
if your service allows binding. ( Sadece onHandleIntent() ve onBind() method'larının
implementation'ında super class'ı çağırmamıza gerek yoktur. Service'imizin
binding izin vermesini istiyorsak bu method'u implement etmeliyiz. )
In the
next section, you'll see how the same kind of service is implemented when
extending the base Service class,
which uses more code, but might be appropriate if you need to handle
simultaneous start requests. ( Aynı service yani
started service çeşidindeki service'i yaratmak için Service class'ını extend
edebileceğimizi öğreneceğiz birazdan. Service subclass'ında daha çok kod
yazacağız, aynı anda birden fazlaservice başlatma request'ini handle etmek
istiyorsakService class'ını extend eden bir class tanımlamalıyız.)
Extending the Service class
Using IntentService makes your
implementation of a started service very simple. If, however, you require your
service to perform multi-threading (instead of processing start requests
through a work queue), you can extend the Service class to
handle each intent. ( IntentService class'Inı
kullanarak bir started service implement etmek çok kolaydır. Ancak
multithreading'i destekleyen bir service implement etmek istiyorsak Service
class'ını extend etmeliyiz, yani service'e gelen request'leri bir iş kuyruğuna
sokup bu kuyruktaki işleri tek tek yapmaktansa, bu işlerin aynı anda
yapılabilmesini istiyorsak, Service class'ını extend eden bir class implement
etmeliyiz. )
For comparison, the
following example code shows an implementation of the Service class that
performs the same work as the previous example using IntentService. That is, for each start request,
it uses a worker thread to perform the job and processes only one request at a
time. ( Önceki örnekte IntentService class'ını
extend eden bir service class'ı tanımlamıştık. Bu service başlatılınca 5 saniye
uyuyan bir thread başlatılır, bu thread bitince service otomatik olarak yok
edilir. Aşağıda implement ettiğimiz Service class'ı, bu IntentService class'ı
ile aynı işi yapar. Ancak IntentService class'ını yazmak çok kolaydı ama aynı
işi yapan bir Service class'ı yazmanın ne kadar uzun ve zor olduğunu görüyoruz
aşağıdaki kodda.
Service'e
gelen herbir service başlatma isteği için, bir worker thread çalışır ilgili işi
yerine getirir, bir seferde sadece bir request'i yerine getirir, daha önce
IntentService için de bir worker thread yaratıldığını ve bu worker thread'in
uygulamanın main thread'inden ayrı bir thread'de çalıştığını söylemiştik. )
Handler,Looper
ve HandlerThread konusunu ayrıntılı olarak başka bir başlıkta öğrendik. Burada
kısaca anlatıcam ancak detaylarını ve işleyiş mekanizmasını öğrenmek için
anlattığım derse bakmalısın.
Aşağıda,
Service class'ını extend eden bir class implement ettik. Inceleyelim. Service
class'ında inner class olarak Handler class'ını extend eden bir class
tanımladık, bu class'a refer eden bir reference variable declare ettik. Looper
object refer eden bir reference variable tanımladık.
Inner class
olan Handler class'ın constructor'ı, argument olarak Looper object alır, bu
object'i super class'ın constructor'ına vererek Handler class'ının
constructor'ını çağırır.
Handler
class'Inda handleMessage() method'unu implement ederiz. Bu method argument
olarak Message object alır. Bu method 5 saniye sleep eder uyur sonra stopSelf()
method'unu çağırır. stopSelf() method'unun aldığı argument, service id'sidir,
hangi service'in durdurulacağını belirtir.
Service
class'ının onCreate() method'unda, HandlerThread class'ından bir object
yaratırız, bu object'in start() method'unu çağırırız. Sonra bu object'in
getLooper() method'unu çağırıp Looper object elde ederiz. Sonra ServiceHandler
class'ının constructor'ına argument olarak Looper object'i verip bir
ServiceHandler object yaratırız.
onStartCommand()
method'unda tanımladığımız ServiceHandler class'ından yaratılmış olan object'in
obtainMessage() method'unu çağırarak Message object elde ederiz. Message
object'in arg1 isimli variable'ına, onStartCommand() method'unun aldığı startId
isimli argument assign edilir. Her service'in startId'si unique'dir.
ServiceHandler class'ının sendMessage() method'unu çağırırız, sendMessage()
method'una argument olarak bu Message object verilir. En son integer değeri
olarak START_STICKY
return edilir.
public class HelloService extends Service {

  private Looper mServiceLooper;

  private ServiceHandler mServiceHandler;


  // Handler that receives messages from the thread

  private final class ServiceHandler extends Handler {

      public ServiceHandler(Looper looper) {

          super(looper);

      }

      @Override

      public void handleMessage(Message msg) {

// Normally we would do some work here, like download a file. For our sample, we just sleep for 5 seconds.

          try {

              Thread.sleep(5000);

          } catch (InterruptedException e) {

              // Restore interrupt status.

        Thread.currentThread().interrupt();

          }

// Stop the service using the startId, so that we don't stop the service in the middle of handling another job

          stopSelf(msg.arg1);

      }

  }


  @Override

  public void onCreate() {

    // Start up the thread running the service.  Note that we create a separate thread because the service normally runs in the process's main thread, which we don't want to block.  We also make it background priority so CPU-intensive work will not disrupt our UI.

    HandlerThread thread = new HandlerThread("ServiceStartArguments",

Process.THREAD_PRIORITY_BACKGROUND);

    thread.start();


// Get the HandlerThread's Looper and use it for our Handler

    mServiceLooper = thread.getLooper();

    mServiceHandler = new ServiceHandler(mServiceLooper);

  }


  @Override

  public int onStartCommand(Intent intent, int flags, int startId) {

      Toast.makeText(this, "service starting", Toast.LENGTH_SHORT).show();


// For each start request, send a message to start a job and deliver the start ID so we know which request we're stopping when we finish the job

      Message msg = mServiceHandler.obtainMessage();

      msg.arg1 = startId;

      mServiceHandler.sendMessage(msg);


// If we get killed, after returning from here, restart

      return START_STICKY;

  }


  @Override

  public IBinder onBind(Intent intent) {

// We don't provide binding, so return null

      return null;

  }


  @Override

  public void onDestroy() {

    Toast.makeText(this, "service done", Toast.LENGTH_SHORT).show();

  }

}
However, because you handle
each call to onStartCommand() yourself,
you can perform multiple requests simultaneously. That's not what this example
does, but if that's what you want, you can create a new thread for each request
and run them right away instead of waiting for the previous request to finish. ( Service yaratmak için gelen herbir request'i onStartCommand()
method'unda handle ettiğimiz için aynı anda birden fazla request'i
gerçekleştirebilriz.Bu örnekte birden fazla request'i gerçekleştiren bir kod
yazılmamıştır ancak böyle bir kod yazmak istiyorsanız, herbir request için bir
thread yaratıp bu thread'leri çalıştırmalısınız. Bir request'i başlatmak için
başka bir request'in tamamlanmasını beklemeye gerek yoktur bu sayede. )
Notice that the onStartCommand() method must return an integer. The
integer is a value that describes how the system should continue the service in
the event that the system kills it. The default implementation for IntentService handles this for you, but you are
able to modify it. The return value from onStartCommand() must be one of the following
constants: (onStartCommand() method'u integer
return eder. Bu integer değeri şu ne için kullanılır? Eğer memory az kalırsa ve
bu durumda sistem servisimizi yok etmek zorunda kalıp service'imizi yok ederse,
daha sonrasında service'imizin tekrar başlatılıp başlatılmayacağını vs.
belirler bu integer değeri. IntentService class'ının onStartCommand() method'u
bunu bizim için handle eder, ancak istersek bu ayarı yani onStartCommand()
method'unun return ettiği değeri değiştirebiliriz. onStartCommand() method'unun
return ettiği integer değeri şunlardan birisi olabilir. )
START_NOT_STICKY
If the system kills the
service after onStartCommand() returns, do not recreate the service unless there are
pending intents to deliver. This is the safest option to avoid running your
service when not necessary and when your application can simply restart any unfinished
jobs. (onStartCommand() method'u return ettikten sonra sistem
service'i memory yetersizliğinden dolayı kill ederse, bu service tekrar
yaratılmaz. Ancak service'i yaratmak için request varsa, yani service
gönderilmesi beklenen intent varsa bu service tekrar çağırılır. Service'in
gereksiz yere çalışmasını önlemek ve bitirilmeyen işler varsa service'i restart etmek için en güvenli
seçenek budur. )
START_STICKY
If the system kills the
service after onStartCommand()
returns, recreate the service and call onStartCommand(), but do not redeliver the last intent. Instead,
the system calls onStartCommand() with a null intent unless there
are pending intents to start the service. In that case, those intents are
delivered. This is suitable for media players (or similar services) that are
not executing commands but are running indefinitely and waiting for a job. In this process we
will lose the results that might have calculated before. (onStartCommand() method'u return ettikten sonra sistem
service'i memory yetersizliğinden dolayı kill ederse, bu service tekrar
yaratılır ve onStartCommand() method'unu
null intent ile çağırılır. Ancak pending intent'ler varsa, yani service
yaratmak için yeni request'lergelmişse service bu intent'ler ile birlikte
yaratılırarak onStartCommand(intent) method'u çağırılır. Bu seçenek media player'lar gibi,
komut çalıştırmadan süresiz olarak çalışan service'ler için uygundur. )
START_REDELIVER_INTENT
If the
system kills the service after onStartCommand() returns, recreate the service and call onStartCommand() with the last intent that was delivered to the
service. Any pending intents are delivered in turn. This is suitable for
services that are actively performing a job that should be immediately resumed,
such as downloading a file.
It will tell the system to restart and regain the service
after the crash and also redeliver the intents that were present at the time of
crash happened.
(onStartCommand() method'u return ettikten
sonra sistem service'i memory yetersizliğinden dolayı kill
ederse, bu service tekrar yaratılır ve onStartCommand() method'unu service'e gönderilen son intent ile çağırır. Herhangibir
pending intent varsa bu pending intent'ler sırayla service'e iletilir. Aktif olarak
bir iş yapan ve aniden resume edilmesi gereken işleri içeren service'ler,
örneğin dosya indirmek için uygundur bu seçenek. )
For more details about these
return values, see the linked reference documentation for each constant.
-------
http://stackoverflow.com/questions/9093271/start-sticky-and-start-not-sticky
http://stackoverflow.com/questions/14054588/what-is-start-sticky-start-not-sticky-and-start-redeliver-intent-service
http://stackoverflow.com/questions/22058682/difference-between-start-sticky-and-start-redeliver-intent
|
Difference: ( En basit açıklamayla, bunlar arasındaki farkı
açıklayalım. )
START_STICKY : the system will try to re-create your service after
it is killed. (system service'İ öldürdükten sonra
tekrar yaratacaktır. )START_NOT_STICKY : the system will not try
to re-create your service after it is killed(system service'İ öldürdükten sonra tekrar yaratmayacaktır. )
Standard example:
@Override public int onStartCommand(Intent intent, int flags, int startId) { return START_STICKY; } |
---
Both
codes are only relevant when the phone runs out of memory and kills the service
before it finishes executing. ( Telefondaki memory tükenince
service işini bitirmeden yok edilmesi durumunda gerçekleşecek senaryolardan
bahsediyoruz. )
START_STICKY tells the OS to recreate the service
after it has enough memory and call onStartCommand() again with a null intent. Here you
will lose the results that might have computed before. ( sistem
service'i memory yetersizliğinden dolayı kill ederse, yeterli memory olunca bu
service tekrar yaratılır. onStartCommand()method'unu null intent ile çağırır.
Daha önce method içerisinde bir işlem yapılıp veriler elde edildiyse bu veriler
de kaybedilebilir. )START_NOT_STICKY Tells the system not to bother to
restart the service, even when it has sufficient memory. For example, a service
may be started every 15 minutes from an alarm to poll some network state. If it
gets killed while doing that work, it would be best to just let it be stopped
and get started the next time the alarm fires.
( sistem
service'i memory yetersizliğinden dolayı kill ederse, bu service artık memory
yeterli olsa bile tekrar yaratılmaz. Ancak pending request'ler varsa service
yaratılır bunlar için. Böyle bir service'e hangi durumlarda ihtiyacımız olur?
Örneğin, bir alarm 15 dakikada bir bir service başlatabilir, bu işi yaparken
service sistem tarafından öldürülürse service'i restart etmeye gerek yoktur. )START_REDELIVER_INTENT that tells the OS to recreate the
service and redeliver the same intent to onStartCommand().the service's process is killed
before it calls stopSelf() for a given intent, that intent will be re-delivered
to it until it completes (unless after some number of more tries it still can't
complete, at which point the system gives up). This is useful for services that
are receiving commands of work to do, and want to make sure they do eventually
complete the work for each command sent. (Sistem service'i memory yetersizliğinden dolayı kill ederse,
yeterli memory olunca bu service tekrar yaratılır. onStartCommand()
method'unu aynı intent ile çağırır.
Bir işi tamamlaması gereken bir service tanımlamak istiyorsanız bu seçeneği
kullanmalısınız. )
Starting a service
You can start a service from
an activity or other application component by passing an Intent (specifying the service to start)
to startService(). The
Android system calls the service's onStartCommand()
method and passes it the Intent. (Bir activity veya başka bir uygulama component'i,
startService(context,some_intent) method'Unu çağırarak bir service başlatır.
Android sistemi, onStartCommand() method'unu çağırır, bu method'a argument
olarak intent object'i verir. )
Note: Never
call onStartCommand() directly. (onStartCommand() method'unu asla manuel olarak yani
doğrudan çağırmayınız, bu method sadece sistem tarafından otomatik olarak
çağırılır. )
For example, an activity can
start the example service in the previous section (
HelloService) using an explicit intent with startService(), as shown
here: ( Örneğin bir activity,expilicit intent
kullanarak yukarıda tanımladığımız service'i şu şekilde başlatabilir. )
Intent intent = new Intent(this, HelloService.class);
startService(intent);
startService(intent);
The startService() method returns immediately, and
the Android system calls the service's onStartCommand() method. If
the service is not already running, the system first calls onCreate(), and then
it calls onStartCommand().( startService()
method'u hemen return eder. Android sistemi service class'Inın onStartCommand()
method'unu çağırır. Eğer service bu kod çalıştırıldığında service henüz
yaratılmamışsa, sistem önce onCreate() sonra onStartCommand() method'unu
çağırır. )
If the service does not also
provide binding, the intent that is delivered with startService() is the
only mode of communication between the application component and the service.
However, if you want the service to send a result back, the client that starts
the service can create a PendingIntent for a
broadcast (with getBroadcast()) and deliver it to the service in
the Intent that
starts the service. The service can then use the broadcast to deliver a result. ( Service'iniz binding sağlamıyorsa, service ve uygulama
component'i arasındaki tek iletişim startService() method'u ile gönderilen
intent'dir. Eğer service'inizin de uygulama component'ine bir sonuç
göndermesini istiyorsanız, service'i başlatan activity broadcast için bir
PendingIntent yaratabilir ve bu intent'i service'i başlatan intent'in içinde
service'e gönderir. Yani Service activity'ye cevap olarak bir intent göndermek
için broadcast kullanır. )
Multiple requests to start
the service result in multiple corresponding calls to the service's onStartCommand(). However, only one request to
stop the service (with stopSelf() or stopService()) is required to stop it. ( Bir service'i başlatmak için birden fazla request
olursa, bu request'ler aynı service'in onStartCommand() method'unun birden
fazla defa çağırılmasını sağlar service zaten başlatılmışsa. Buna karşın,
service'İ durdurmak için stopSelf veya stopService() method'Unu bir defa
çağırmak yeterlidir. )
Stopping a service
A started service must
manage its own lifecycle. That is, the system does not stop or destroy the
service unless it must recover system memory and the service continues to run
after onStartCommand() returns.
The service must stop itself by calling stopSelf(), or another component can stop it by calling stopService().( Sistem memory'de yeterli alan olduğu müddetçe, sistem
service'i durdurmaz, dolayısıyla onStartCommand() method'u return ettikten
sonra da service çalışmaya devam eder. Service kendini durdurmak için
stopSelf() method'unu çağırır. Başka bir uygulama component'i service'i
durdurmak için stopService() method'unu çağırır. )
Once requested to stop with stopSelf() or stopService(), the system destroys the service
as soon as possible.
If your service handles
multiple requests to onStartCommand()
concurrently, you shouldn't stop the service when
you're done processing a start request, as you might have received a new start
request (stopping at the end of the first request would terminate the second one).
To avoid this problem, you can use stopSelf(int) to ensure
that your request to stop the service is always based on the most recent start
request. That is, when you call stopSelf(int), you pass the ID of the start
request (the startId delivered
to onStartCommand()) to which your stop request
corresponds. Then, if the service receives a new start request before you are
able to call stopSelf(int), the ID does not match and the
service does not stop. ( Eğer service'iniz,
onStartCommand() method'Una gelen birden fazla request'i aynı anda handle
edebiliyorsa, bir start request ile işiniz bittiğinde service'i
durdurmamalısınız, çünkü bu sırada yeni bir start request gelmiş olabilir, 1.
request'İn işi bitince service'i durdurursak 2.request'i işi bitmemesine rağmen
aniden yok etmiş oluruz. Bu problem'i önlemek için, stopSelf() method'unu çağırırken,
service'i durdurmak için yapılan request'in en son gelen start request olduğuna
emin olmalıyız, yani son start request tamamlandıktan sonra stopSelf()
method'unu çağırdığınızdan emin olun. Çünkü stopSelf(int) method'unu
çağırdığımızda, bu method'a argument olarak start request'in ID'sini veririz,
yani onStartCommand() method'unun aldığı startId argument'inin değerini
stopSelf(int) method'una argument olarak veririz. Dolayısıyla, stopSelf(int)
method'una çağıramadan service'e yeni bir start request gelirse, stopSelf()'in
aldığı parametre ve onStartCommand() method'unun aldığı son startId
parametresinin değeri aynı olmayacaktır, dolayısıyla service
durdurulmayacaktır. )
Caution: To avoid wasting system resources
and consuming battery power, ensure that your application stops its services
when it's done working. If necessary, other components can stop the service by
calling stopService(). Even if you enable binding for
the service, you must always stop the service yourself if it ever receives a
call to onStartCommand().( System
resource'ları israf edilmemesi ve bataryanın gücünü tüketmemek için,
uygulamamızın service'lerini işi bitince durdurduğumuzdan emin olmalıyız.
Gerekirse, diğer uygulama bileşenleri de stopService() method'unu çağırarak
service'i durdurabilir. Service'imiz için binding'i enable etsek bile,
service'İmizin onStartCommand() method'u bir kez bile çağırılıyorsa
service'imizi kendimiz yok etmek zorundayız. onStartCommand() method'u hiç
çağırılmıyorsa sadece binding kullanılıyorsa bu durumda service'i kendimiz yok
etmemize gerek kalmaz. )
For more information about
the lifecycle of a service, see the section below about Managing
the Lifecycle of a Service.
Creating
a bound service
A bound service is one that
allows application components to bind to it by calling bindService() to create
a long-standing connection. It generally doesn't allow components to start it
by calling startService().( Bir
uygulama bileşeni bindService() method'unu çağırarak bir bound service'e
bağlanır(bind edilir, uzun süreli bir bağlantı kurulur). Uygulama
bileşenlerinin startService() method'unu çağırarak Bound service başlatmasına
genellikle izin verilmez. )
Create a bound service when
you want to interact with the service from activities and other components in
your application or to expose some of your application's functionality to other
applications through interprocess communication (IPC).
( Şu 2 durum için bound service yaratabilirsiniz:
- Activity veya diğer uygulama bileşenlerinin bir service
ile iletişim kurması için.
- IPC(Process'ler arası iletişim ) ile, uygulamanızın bazı
functionality'lerini diğer uygulamaların kullanımına sağlamak için. )
To create a bound service,
implement the onBind() callback
method to return an IBinder that
defines the interface for communication with the service. Other application
components can then call bindService() to
retrieve the interface and begin calling methods on the service. The service
lives only to serve the application component that is bound to it, so when
there are no components bound to the service, the system destroys it. You do not need
to stop a bound service in the same way that you must when the service is
started through onStartCommand().( Bir bound
service yaratmak için, onBind() callback method'unu implement edin. Bu method, IBinder object return eder, bu object
service ile iletişim için kullanılacak olan interface'dir. Activity veya diğer
uygulama bileşenleri bindService() method'unu çağırarak IBinder interface'i
elde edebilirler, bu interface sayesinde service'in method'larını çağırabilirler.
Bu durumda, service sadece kendisine bağlanan(bind olan) uygulama bileşenleri
için yaşar, kendisine bağlı bir uygulama bileşeni kalmayınca ise sistem
service'i otomatik olarak yok eder. onStartCommand() method'u çağırılarak
başlatılan service'leri yani Started service'leri kendimiz durdurmak zorundayız
demiştik, ancak bound service'leri kendimiz manuel olarak durdurmayız sistem
otomatik olarak durdurur. )
To create a bound service,
you must define the interface that specifies how a client can communicate with
the service. This interface between the service and a client must be an
implementation of IBinder
and is what your service must return from the onBind() callback
method. After the client receives the IBinder, it can begin interacting with the service
through that interface. ( Client'ın service ile
nasıl iletişim kuracağını belirtmek için bir interface tanımlamalıyız. Service
ve client arasındaki bu interface IBinder'ın implementation'ı olmak zorundadır.
Bu interface, service'in onBind() method'unun return ettiği interface
olacaktır. Client, yani bir uygulama bileşeni, service'İn onBind() method'unu
çağırarak bir IBinder object elde ettiğinde, bu object'in method'larını
çağırarak service'İn method'larını çağırmış olur, bu yolla service ile iletişim
kurar. )
Multiple clients can bind
to the service simultaneously. When a client is done interacting with the
service, it calls unbindService() to unbind.
When there are no clients bound to the service, the system destroys the
service. ( Birden fazla client, bir service'e aynı
anda bağlanabilir. Bir client service ile iletişimini kurdu işini bitirdi
diyelim, artık service'e ihtiyacı kalmadıysa service ile arasında kurduğu
bağlantıyı kopartmak için unbindService()
method'unu çağırır. Service'e bağlı hiçbir client kalmayınca, sistem service'i
otomatik olar yok eder. )
There are multiple ways to
implement a bound service, and the implementation is more complicated than a
started service. For these reasons, the bound service discussion appears in a
separate document about Bound Services. ( Bir
bound service implement etmenin birden fazla yolu vardır. Bir bound service
implement etmek, started service implement etmekten daha karmaşıktır.
Dolayısıyla Bound service'leri ayrı bir başlıkta inceleyeceğiz. )
Sending notifications to the user
Running a service in the foreground
Managing the lifecycle of a service

*******buraya geri dönülecek*********
The basics
Binding to a started service
Creating a bound service
Sending notifications to the user
When a service is running, it can notify the user of events using Toast Notifications or Status Bar Notifications. ( Service çalışırken kullanıcıya 2 farklı yolla bildirim yapılabilir, yani 2 farklı notification gönderilebilir: Toast Notifications veya Status Bar Notifications )
A toast notification is a message that appears on the surface of the current window for only a moment before disappearing.
A status bar notification provides an icon in the status bar with a message, which the user can select in order to take an action (such as start an activity). ( Status bar notification, status bar'da bir icon ve mesaj gösterir. Kullanıcı buna tıklayacak bir aksiyon alabilir, örneğin kullanıcı bu notification'a tıklayınca yeni bir activity başlayabilir. )
Usually, a status bar notification is the best technique to use when background work such as a file download has completed, and the user can now act on it. When the user selects the notification from the expanded view, the notification can start an activity (such as to display the downloaded file). ( Genellikle arka planda çalışan bir iş yaparken , status bar notification kullanmak en iyi yoldur. Örneğin bir dosyanın indirilmesi tamamlandığında bir status bar notification gösteririz, kullanıcı bu notification'a tıklar tıklayınca yeni bir activity açılır bu activity'de download edilen dosya gösterilir. )
See the Toast Notifications or Status Bar Notifications developer guides for more information. ( Bu notification'Ları ayrı bir başlıkta inceleyeceğim. O başlıktan detaylarını öğrenebilirsin. )
Running a service in the foreground
A foreground service is a service that the user is actively aware of and is not a candidate for the system to kill when low on memory.
A foreground service must provide a notification for the status bar, which is placed under the Ongoing heading. This means that the notification cannot be dismissed unless the service is either stopped or removed from the foreground. ( Foreground service, kullanıcı bir service'İn çalışmasından haberdar ise bu bir foreground service'dir. Yani arka planda kullanıcıdan habersiz çalışan service'ler foreground service değildir. Telefonun memory'sinde yer kalmadığında sistem'in service'leri öldüreceğini söylemiştik daha önce, ancak sistem telefonun memory'sinde yer kalmasa bile bir foreground service'i asla yok etmez.
Bir Foreground service, status bar'da bir notification göstermek zorundadır. Service, çalışmaya devam ettiği ve foreground'da kaldığı sürece status notification gösterilmeye devam edecektir. Service durdurulursa veya foreground'dan silinirse status notification kaybolacaktır. )
For example, a music player that plays music from a service should be set to run in the foreground, because the user is explicitly aware of its operation. The notification in the status bar might indicate the current song and allow the user to launch an activity to interact with the music player. ( Örneğin, müzikçalar uygulaması foreground'da çalışan bir service'e sahiptir çünkü kullanıcı bu işlemden yani müziğin çalmasından haberdardır. Status bar'daki notification current song'u göstermelidir, bu notification'a tıklayınca yeni bir activity başlatılıp kullanıcının music player ile etkileşimde bulunması sağlanır. )
To request that your service run in the foreground, call startForeground(). This method takes two parameters: an integer that uniquely identifies the notification and the Notification for the status bar. ( Service'inizin foreground'da çalışması için, startForeground() method'unu çağırmalısınız. Bu method 2 argument alır:
- Notification'a özel unique bir integer
- Notification object, status bar'da bu notification object'in özellikleri gösterilir. )
Örnek : Explicit intent object yarattık. Sonra PendingIntent object yarattık, PendingIntent class'ı ne için kullanılır bilmiyorum ancak bu örnekte notification object'in setContentIntent() method'una parametre olarak verilir, neden notificationIntent isimli object değil de Pending Intent object verildi setContentIntent method'una bilmiyorum araştır öğren, notification'a tıklayınca ExampleActivity isimli activity'nin açılmasını sağlar. new Notification.Builder(this).build() diyerek bir Notification object elde edilir. Bu object'in title'ını, text'ini ve icon'unun set etmek için sırayla setContentTitle(), setContentText(), setSmallIcon() method'ları çağırılır. notification'a tıklayınca açılacak olan activity'yi belirtmek için setContentIntent(pendingIntent) method'u çağırılır. setTicker() method'unun amacını bilmiyorum, araştır öğren bi kaynakta şöyle demiş : ticker is a Text that summarizes this notification for accessibility services, it is not shown on screen, it is useful to accessibility services (where it serves as an audible announcement of the notification's appearance). En son startForeground() method'u çağırılır,2. parametre notification object'dir, 1.parametre bu notification'a özel unique bir integer'dır.
Intent notificationIntent = new Intent(this, ExampleActivity.class);
PendingIntent pendingIntent = PendingIntent.getActivity(this, 0, notificationIntent, 0);
Notification notification = new Notification.Builder(this)
.setContentTitle(getText(R.string.notification_title))
.setContentText(getText(R.string.notification_message))
.setSmallIcon(R.drawable.icon)
.setContentIntent(pendingIntent)
.setTicker(getText(R.string.ticker_text))
.build();
startForeground(ONGOING_NOTIFICATION_ID, notification);
To remove the service from the foreground, call stopForeground(). This method takes a boolean, which indicates whether to remove the status bar notification as well. This method does not stop the service. However, if you stop the service while it's still running in the foreground, the notification is also removed. ( Bir service'i foreground'dan silmek için stopForeground() method'unu çağırırız. Bu method boolean parametre alır, bu boolean status bar'daki notification'ı silip silmemeyi belirtir. Yani foreground'da çalışan bir service'i foreground'dan silerken notification status'ün ekranda kalıp kalmamasını biz belirleriz. stopForeground() method'u service'i durdurmaz. Ancak bir service'i foreground'da çalışırken durdurursak, notification otomatik olarak ekrandan kaybolur. )
Managing the lifecycle of a service
The lifecycle of a service is much simpler than that of an activity. However, it's even more important that you pay close attention to how your service is created and destroyed because a service can run in the background without the user being aware. ( Bir service'in yaşam döngüsü, bir activity'nin yaşam döngüsüne göre daha basittir. Ancak service'i yaratırken ve yok ederken çok dikkatli olmalıyız çünkü service kullanıcının farkında olmadan arka planda çalışmaya devam edebilir, yaşam döngüsünün istediğimiz gibi çalıştığından emin olmalıyız. )
The service lifecycle—from when it's created to when it's destroyed—can follow either of these two paths: ( Service'İn yaratılmasından yok edilmesine kadar olan yaşam sürecinin özeti aşağıdaki gibidir. )
· A started service
The service is created when another component calls startService(). The service then runs indefinitely and must stop itself by calling stopSelf(). Another component can also stop the service by calling stopService(). When the service is stopped, the system destroys it.
· A bound service
The service is created when another component (a client) calls bindService(). The client then communicates with the service through an IBinder interface. The client can close the connection by calling unbindService(). Multiple clients can bind to the same service and when all of them unbind, the system destroys the service. The service does not need to stop itself.
These two paths are not entirely separate. You can bind to a service that is already started with startService(). For example, you can start a background music service by calling startService() with an Intent that identifies the music to play. Later, possibly when the user wants to exercise some control over the player or get information about the current song, an activity can bind to the service by calling bindService(). In cases such as this, stopService() or stopSelf() doesn't actually stop the service until all of the clients unbind. ( Started servce ve bound service'İn yaşam döngüsü birbirinden tamamen ayrı değildir. startService() method'Unu çağırarak başlattığımız bir service'e bind edebiliriz, service'i startService() method'Unu çağırarak başlattığımız için bu service stopSelf() veya stopService() method'U çağırılarak durdurulmalıdır, ancak bu service bind edilmiş bir uygulama component'i varsa stopSelf() veya stopService() method'unu çağırarak service'i durduramayız. Service'i durdurmak için önce bind olan component'lerin unbound olması lazım, sonra da stopSelf() veya stopService() method'unu çağırmamız lazımdır.
Örneğin, arka planda çalışan bir müzik service'İni startService() method'unu çağırarak başlatabiliriz, startService() method'una verdiğimiz intent ile çalınacak müziği belirleriz. Sonra kullanıcı müzik çalarken müziği ileri geri oynattığında veya çalan müzik hakkında bilgi almak istediğinde activity bindService() method'unu çağırarak service'e bind edebilir. Müzik çalmakta olduğundan bunu sağlayan service'in onStartCommand() method'unu rahatsız etmememiz gerektiği için, yani müziğin çalmaya devam etmesi için, startService() method'unu çağırmak yerine bindService() method'Unu çağırarak service'e bind ettiğimizi düşünüyorum.
Böyle bir case'de, service'e bind olan client'lar olduğu müddetçe, stopSelf() veya stopService() method'unu çağırsak bile service durmaz, önce service'e bind olan client'lar service'den ayrılmalıdır. )
Implementing the lifecycle callbacks
Like an activity, a service has lifecycle callback methods that you can implement to monitor changes in the service's state and perform work at the appropriate times. The following skeleton service demonstrates each of the lifecycle methods: ( Service'in sahip olduğu callback method'ları, diğer bir deyişle bir service class'ının iskeleti aşağıda gösterilmiştir.
onStartCommand(), startService() method'u çağırılınca çağırılır, service memory yetersizliğinden öldürülürse sonra ne yapaılacağını belirten bir integer return eder.
onBind(), client ve service arasında kurulan interface'i return eder, bindService() method'u çağırılınca çağırılır.
Bu service'e bind edilen tüm component'ler service'den ayrılınca, onUnbind() method'u çağırılır. Servis, startService() method'u ile başlatıldığı için stopSelf() veya stopService() method'U çağırılana kadar çalışmaya devam eder.)
onUnbind() method'u çağırıldıktan sonra, yani tüm client'lar service'den unbind olduktan sonra bir client service'e bind olursa onRebind() method'u çağırılır.
public class ExampleService extends Service {
int mStartMode; // indicates how to behave if the service is killed
IBinder mBinder; // interface for clients that bind
boolean mAllowRebind; // indicates whether onRebind should be used
@Override
public void onCreate() {
// The service is being created
}
@Override
public int onStartCommand(Intent intent, int flags, int startId) {
// The service is starting, due to a call to startService()
return mStartMode;
}
@Override
public IBinder onBind(Intent intent) {
// A client is binding to the service with bindService()
return mBinder;
}
@Override
public boolean onUnbind(Intent intent) {
// All clients have unbound with unbindService()
return mAllowRebind;
}
@Override
public void onRebind(Intent intent) {
// A client is binding to the service with bindService(),
// after onUnbind() has already been called
}
@Override
public void onDestroy() {
// The service is no longer used and is being destroyed
}
}
Note: Unlike the activity lifecycle callback methods, you are not required to call the superclass implementation of these callback methods. ( Activity'Nin yaşam döngüsü method'larını implement ederken bu method'larda super class implementation'ları invoke etmek gerekir. Ancak Service class'ını extend eden bir class'da super class implementation'ları invoke etmeye gerek yoktur. IntentService class'Inı extend eden bir class yazarsak bazı callback method'larda super class implementation'ları invoke etmek gerekir,detay için yukarıdaki IntentService başlığını okuyun. )

Figure 2. The service lifecycle. The diagram on the left shows the lifecycle when the service is created with startService() and the diagram on the right shows the lifecycle when the service is created with bindService(). (startService() method'u çağırılarak yaratılan service'ler için soldaki diagram'daki yaşam döngüsü geçerlidir. bindService() method'u çağırılarak yaratılan service'ler için sağdaki diagram'daki yaşam döngüsü geçerlidir. )
Figure 2 illustrates the typical callback methods for a service. Although the figure separates services that are created by startService() from those created by bindService(), keep in mind that any service, no matter how it's started, can potentially allow clients to bind to it. A service that was initially started with onStartCommand() (by a client calling startService()) can still receive a call to onBind() (when a client calls bindService()). ( Bu 2 diagram service'leri ayrı göstermesine rağmen, şunu akılda tut : bütün servisler, nasıl başlatılmış olursa olsun, client'ların kendilerine bind olmasına izin verir, yeterki onBind() method'u implement edilmiş olsun. )
By implementing these methods, you can monitor these two nested loops of the service's lifecycle:
· The entire lifetime of a service occurs between the time that onCreate() is called and the time that onDestroy() returns. Like an activity, a service does its initial setup in onCreate() and releases all remaining resources in onDestroy(). For example, a music playback service can create the thread where the music is played in onCreate(), and then it can stop the thread in onDestroy(). ( service'İn yaşamı onCreate () ve onDestroy() arasındadır. Bir activity gibi, initial setup'lar onCreate() method'Unda yapılır, resource'ları release etme işi ise onDestroy() method'unda yapılır. Örneğin bir müzik çalar servisinin onCreate() method'unda bir thread yaratılır, onDestroy() method'unda thread durdurulur. )
Note: The onCreate() and onDestroy() methods are called for all services, whether they're created by startService() or bindService(). (Hem bound hem de started service'lerde, onCreate() ve onDestroy() method'Ları çağırılır. )
· The active lifetime of a service begins with a call to either onStartCommand() or onBind(). Each method is handed the Intent that was passed to either startService() or bindService().
( Bir service'in aktif yaşam döngüsü onStartCommand() veya onBind() method'u çağırılınca başlar. Bu 2 method, startService() veya bindService() method'una verilen intent'i alır. )
If the service is started, the active lifetime ends at the same time that the entire lifetime ends (the service is still active even after onStartCommand() returns). If the service is bound, the active lifetime ends when onUnbind() returns. ( Started service'in hem aktif yaşam döngüsü hem de tüm yaşam döngüsü, onDestroy() method'u çağırılınca biter. onStartCommand() metodu return ettikten sonra started service hala aktif yaşam döngüsü içerisindedir yani.
Bir bounded servisin aktif yaşam döngüsü ise onUnbind() method'u return edince biter. )
Note: Although a started service is stopped by a call to either stopSelf() or stopService(), there is not a respective callback for the service (there's no
onStop() callback). Unless the service is bound to a client, the system destroys it when the service is stopped—onDestroy() is the only callback received. ( Started service stopSelf() or stopService() method'larından biri çağırılınca durdurulmasına karşın, bu method'lara karşılık gelen bir callback method'unun yani onStop() gibi bir method'un olmadığına dikkat et! Service'e bound olan bir client yoksa, service durdurulunca yok edilir.)
*******buraya geri dönülecek*********
What is the difference between intentservice and service ? google'dan araştırıp yaz.
https://code.tutsplus.com/tutorials/android-fundamentals-intentservice-basics--mobile-6183
http://stacktips.com/tutorials/android/creating-a-background-service-in-android
http://www.vogella.com/tutorials/AndroidServices/article.html buradan da faydalan.
21.3 - http://www.javatpoint.com/android-service-tutorial buradaki örneği de yazabilriz, started services, play music
21.4 - Bound services
https://developer.android.com/guide/components/bound-services.html
A bound service is the server in a client-server interface. It allows components (such as activities) to bind to the service, send requests, receive responses, and perform interprocess communication (IPC). A bound service typically lives only while it serves another application component and does not run in the background indefinitely. ( Bound service, client server mimarisindeki server'dır gibi düşnebilirsin. Bound server, uygulama component'lerinin örneğin activity'lerin kendisine bağlanmasını bind olmasına izin verir. Bound server'a bind edilen bir component bound server'a request gönderebilir ve bound server'dan response alabilir. Bu yolla process'ler arası iletişim(IPC) de sağlanabilir. Bir bound service, kendisine bind olan bir component olduğu müddetçe yaşayabilir. )
Note: If your app targets Android 5.0 (API level 21) or later, it's recommended that you use the JobScheduler to execute background services. For more information about JobScheduler, see its API-reference documentation. ( Uygulamanız Android 5.0 ve sonrasını hedefliyorsa, arka planda çalışan service'ler yazmak için JobScheduler'ı kullanmanız tavsiye edilir. )
The basics
A bound service is an implementation of the Service class that allows other applications to bind to it and interact with it. To provide binding for a service, you must implement the onBind()
callback method. This method returns an IBinder object that defines the programming interface that clients can use to interact with the service. ( Bir bound service, Service class'ının bir implementation'ıdır, aynı uygulamanın veya diğer uygulamaların component'leri bound service'e bind ederler(bağlanırlar). Service'inizin binding'e izin vermesi için, onBind() callback method'unu implement edin. onBind() method'u, IBinder object return eder, IBinder object service ile iletişim için kullanılacak olan interface'i sağlar. )
Binding to a started service
As discussed in the Services document, you can create a service that is both started and bound. That is, you can start a service by calling startService(), which allows the service to run indefinitely, and you can also allow a client to bind to the service by calling bindService(). ( Hem started hem de bound olan bir service yaratmak mümkündür demiştik daha önce de. Bunu şu şekilde yaparız : startService() method'unu çağırarak service'İn arka planda süresiz olarak çalışmasını sağlarız, biz ona dur diyene kadar servis çalışmaya devam eder. Bu service'in onBind() method'u implement edilmişse, bu service binding'e de izin veriyordur, dolayısıyla bir client(örneğin aynı uygulama içindeki bir activity) bindService()
method'unu çağırarak bu service bind olabilir(bağlanabilir). )
If you do allow your service to be started and bound, then when the service has been started, the system does not destroy the service when all clients unbind. Instead, you must explicitly stop the service by calling stopSelf() or stopService(). ( service başlığında bunu öğrenmiştik. )
Although you usually implement either onBind() or onStartCommand(), it's sometimes necessary to implement both. For example, a music player might find it useful to allow its service to run indefinitely and also provide binding. This way, an activity can start the service to play some music and the music continues to play even if the user leaves the application. Then, when the user returns to the application, the activity can bind to the service to regain control of playback. ( Genellikle onBind() method'unu ya da onStartCommand() method'unu implement ederiz. Ancak bazen bu iki method'u da implement etmemiz gerekebilir. Örneğin bir müzik çalar uygulaması için implement edeceğimiz service, onStartCommand() method'unu çağırarak müziği çalmaya başlar, müzik arka planda süresizce çalmaya devam eder çünkü bu started service'dir biz dur diyene kadar çalışmaya devam eder, activity started service'e intent gönderir bu case'de. Ancak müziği belirli bir noktadan ilerletmek istiyoruz diyelim, ileri sarmak istiyoruz diyelim, veya müzik hakkında bir bilgi almak istiyoruz diyelim. Bu durumda service'den activity'ye bilgi akması lazım ki activity'nin ui'ı da ona göre güncellensin. İşte bunu yani service'den activity'ye veri gönderme işini ancak bounded service ile yapabiliriz. Dolayısıyla biz uygulamadan home ekranına geçtiğimizde müzik arka planda çalmaya devam ederken bu service started service olarak çalışır, ancak kullanıcı uygulamayı tekrar açtığında activity service'e bind olarak bağlantı kurar. )
A client can bind to a service by calling bindService(). When it does, it must provide an implementation of ServiceConnection, which monitors the connection with the service. ( Bir client, bindService() method'unu çağırarak bir service'e bind olabilir(bağlanabilir). Client service'e bind olursa, ServiceConnection class'ının implementation'ını sağlamak zorundadır. Bu class service ile kurulan bağlantıyı monitor eder (izler). )
The bindService() method returns immediately without a value, but when the Android system creates the connection between the client and service, it calls
onServiceConnected() on the ServiceConnection, to deliver the IBinder that the client can use to communicate with the service. ( bindService() method'u hemencecik return eder. Client ve service arasında bir bağlantı kurulunca, sistem ServiceConnection object'in onServiceConnected() method'unu çağırır, böylece client'ın service ile iletişim kurmak için kullanacağı IBinder object'i client'a teslim eder. )
Multiple clients can connect to a service simultaneously. However, the system calls your service's onBind() method to retrieve the IBinder
only when the first client binds. The system then delivers the same IBinder to any additional clients that bind, without calling onBind() again. ( Birden fazla client bir service'e aynı anda bağlanabilir. Buna karşın, sistem service'in onBind() method'unu sadece ilk client bind edildiği zaman çağırır. Service'e başka client'lar bağlanmak istediğinde onBind() method'u çağırılmaz, sistem aynı IBinder object'i otomatik olarak isteyen client'lara verir. )
When the last client unbinds from the service, the system destroys the service, unless the service was also started by startService(). ( Service'e bağlı olan son client da unbind olunca, eğer service startService() method'u çağırılarak başlatılmadıysa sistem service'i yok eder. )
The most important part of your bound service implementation is defining the interface that your onBind() callback method returns. The following section discusses several different ways that you can define your service's IBinder interface. ( Bound service implement etmenin en önemli kısmı onBind() method'unun return ettiği interface'i yani IBinder'ı tanımlamaktır. Service'in IBinder interface'ini tanımlamak için farklı yollar vardır. Bu yolları öğreneceğiz şimdi. )
Creating a bound service
Service'in IBinder interface'ini tanımlamak için 3 farklı yol vardır:
- Binder class'ını extend etmek
- Messenger kullanmak
- AIDL kullanmak
If your service is private to your own application and runs in the same process as the client (which is common), you should create your interface by extending the Binder class and returning an instance of it from onBind(). The client receives the Binder and can use it to directly access public methods available in either the Binder implementation or the Service. ( Eğer service'inizi, sadece kendi uygulamanız içerisinde kullanacaksanız, yani service'iniz kendi uygulamanıza özel olacaksa, yani client ve service aynı process'de(aynı uygulamada) çalışacaksa, Binder class'ını extend eden bir interface yaratmalısınız ve onBind() method'unda bu interface'i return etmelisiniz. Client, Binder interface'i elde edip bu interface'İ kullanarak Binder implementation'daki veya Service implementation'daki public method'lara doğrudan erişebilir, bundan kasıt nedir umarım ilerleyen sayfalarda anlarız.. )
This is the preferred technique when your service is merely a background worker for your own application. The only reason you would not create your interface this way is because your service is used by other applications or across separate processes. ( Eğer yazacağınız service sadece kendi uygulamanız için çalışacaksa, IBinder interface tanımlamak için en uygun teknik budur. Bu tekniği kullanmamanız için gerekli neden şu ikisinden biri olmalıdır, ya service'İnizin diğer uygulamalar tarafından da kullanılabilir olmasını istiyorsunuzdur ya da service'izin farklı process'ler arasında iletişim kurmasını istiyorsunuzdur. )
Ayrıntıları daha sonra göreceğiz...
If you need your interface to work across different processes, you can create an interface for the service with a Messenger. In this manner, the service defines a Handler that responds to different types of Message objects. This Handler is the basis for a Messenger that can then share an IBinder with the client, allowing the client to send commands to the service using Message objects. Additionally, the client can define a Messenger of its own, so the service can send messages back. (IBinder interface'inin farklı process'ler arasında iletişimi sağlamasını istiyorsanız, Messenger ile bir interface tanımlayabiliriz.
Service, bir Handler tanımlar. Handler, farklı type'daki Message object'lere cevap verir. Handler , Messenger için çok önemlidir. Handler, bir IBinder verir client'a. IBinder sayesinde, client service'e Message object'leri kullanarak komut gönderebilir. Ayrıca,client kendine ait bir Messenger da tanımlayabilir. )
This is the simplest way to perform interprocess communication (IPC), because the Messenger queues all requests into a single thread so that you don't have to design your service to be thread-safe. ( Process'ler arası iletişim kurmak için kullanılacak en kolay yol budur. Çünkü Messenger tüm request'leri bir single thread'e kuyruğa sokar, bu sayede service'inizi thread safe olacak şekilde geliştirmenize gerek yoktur. Messenger kullanırsanız, service'iniz tüm request'leri bir kuyruğa sokup bu request'leri tek tek işlediği için service'imiz thread safe olacaktır. )
Ayrıntıları daha sonra göreceğiz...
Android Interface Definition Language (AIDL) decomposes objects into primitives that the operating system can understand and marshals them across processes to perform IPC. The previous technique, using a Messenger, is actually based on AIDL as its underlying structure. As mentioned above, the Messenger creates a queue of all the client requests in a single thread, so the service receives requests one at a time. If, however, you want your service to handle multiple requests simultaneously, then you can use AIDL directly. In this case, your service must be thread-safe and capable of multi-threading. ( AIDL, object'leri işletim sisteminin anlayabileceği primitive'lere decompose eder(ayrıştırır,parçalar,böler) ve bu primitive'leri process'ler arasında getirip götürerek process'ler arasında iletişimi sağlar. Önceki anlattığımız teknik yani Messenger kullanılarak IBinder interface yaratma tekniğinin altyapısı da AIDL'ye dayanır. Yukarıda anlatıldığı gibi, Messenger client'lardan gelen tüm request'leri single bir thread'deki kuyruğa sokar; service bir sefer-de sadece bir request alır. Eğer service'inizin aynı anda birden fazla request'i handle etmesini istiyorsanız, AIDL tekniğini kullanmalısınız. Bu durumda service'inizi thread safe ve multithreading olacak şekilde geliştirme sorumluluğu size aittir, bunları kendiniz yapacaksınız. )
To use AIDL directly, you must create an
.aidl file that defines the programming interface. The Android SDK tools use this file to generate an abstract class that implements the interface and handles IPC, which you can then extend within your service. ( AIDL kullanmak için, .aidl uzantılı bir dosya yaratmak zorundasınız. .aidl uzantılı dosya programlama interface'ini tanım-lar. Android SDK tools, bu dosyayı kullanarak bir abstract class generate eder(oluşturur). Bu abstract class, interface'İ implement eder ve IPC'yi handle eder. Service class'ınızda bu abstract class'ı extend edersiniz. )
Note: Most applications shouldn't use AIDL to create a bound service, because it may require multithreading capabilities and can result in a more complicated implementation. As such, AIDL is not suitable for most applications and this document does not discuss how to use it for your service. If you're certain that you need to use AIDL directly, see the AIDL document. ( Çoğu uygulama, bound service yaratmak için AIDL'i kullanmamalıdır çünkü AIDL kullanmak için multithreading'i kendimiz dizayn et-mek zorundayız bu da çok karmaşık implementation'lar gerekti-rebilir. Dolayısıyla çoğu uygulama için AIDL uygun değidir. Dolayı-sıyla AIDL'in detaylarına girmeyeceğiz. Ancak AIDL'e ihtiyacım var diyorsan, linkteki AIDL dökümanına bakabilirsin. )
Extending the Binder class
Binder class'ı extend ederek bir IBinder interface tanımlaya-bileceğimizi daha önce söylemiştik. Ancak implementation'ı nasıl yapacağını atlamıştık. İşte şimdi bu detayları öğreneceğiz.
If your service is used only by the local application and does not need to work across processes, then you can implement your own Binder class that provides your client direct access to public methods in the service. ( Service'i sadece kendi uygulamamızda kullanacaksak bu yöntemi kullanabiliriz. Binder class'ını extend eden bir class tanımlarız. Bu class, client'ın service'imizdeki public method'Lara doğrudan erişebilmesini sağlar. )
Note: This works only if the client and service are in the same application and process, which is most common. For example, this would work well for a music application that needs to bind an activity to its own service that's playing music in the background. ( Bu yöntem sadece, client ve service aynı uygulama ve process'de ise çalışır. Çoğunlukla ihtiyaç bu şekildedir. Örneğin, bu yöntem şöyle bir müzik uygulaması için işe yarar: bir activity'yi uygulamanın arka planda müzik çalan kendi service'ine bind etmek için. )
Here's how to set it up: ( Binder interface'İ şöyle tanımlarız: )
1. In your service, create an instance of Binder that does one of the following: ( Binder class'ından bir instance yaratalım. Bu instance aşağıdakilerden birini yapıyor olsun. )
o Contains public methods that the client can call. ( Binder class, Client'ın çağırabileceği public method'lar içersin. )
o Returns the current Service instance, which has public methods the client can call. ( current Service object'i return etsin. Current Service object, client'ın çağırabileceği public method'lara sahip olsun. )
o Returns an instance of another class hosted by the service with public methods the client can call. ( Service'in sahip olduğu başka bir class'ın instance'ını return etsin, bu class ise client'ın çağırabileceği public method'lara sahip olsun. )
2. Return this instance of Binder from the onBind() callback met-hod. ( onBind() method'u tanımladığımız Binder subclass'ı-nın bir instance'ının return ediyor olsun. )
3. In the client, receive the Binder from the onServiceConnec-ted() callback method and make calls to the bound service using the methods provided. ( Client'da, onServiceConnected() callback method'undan Binder object'i al. Bu binder object'in method'larını çağırarak bound service'in method'larını çağırabilirsin artık. )
Note: The service and client must be in the same application so that the client can cast the returned object and properly call its APIs. The service and client must also be in the same process, because this technique does not perform any marshaling across processes. ( Service ve client aynı uygulamada olmak zorundadır, böylece client returned object'i(Binder object'ini kastediyor sanırım) cast edebilir ve bu object'in API'larını çağırabilir. Service ve client da aynı process'de olmak zorundadır çünkü bu teknik process'ler arasında marshalling(getirip götürme) yapmaz. )
Aşağıdaki örneği geçmeden önce java'daki şu konuyu öğrenmemiz lazım : How can “this” of the outer class be accessed from an inner class? What is the "this" keyword inside inner class?
İnner class'ın içerisinde outer class'a nasıl refer ederiz? You can access the instance of the outer class with the following code inside outer class : Outer.this
Example :
class Outer {
void aMethod() {
NewClass newClass = new NewClass() {
void bMethod() {
System.out.println( Outer.this.getClass().getName() );
// reach the outer class and print the name of Outer class
}
};
}
}
Inner class'ın içerisinden, outer class'daki bir method'u aşağıdaki gibi çağırabiliriz.
OuterClassName.this.outerClassMethod();
http://www.geeksforgeeks.org/static-class-in-java/
Can a class be static in Java ?
The answer is YES, we can have static class in java. In java, we have static instance variables as well as static methods and also static block. Classes can also be made static in Java.
The answer is YES, we can have static class in java. In java, we have static instance variables as well as static methods and also static block. Classes can also be made static in Java.
Java allows us to define a class within another class. Such a class is called a nested class. The class which enclosed nested class is known as Outer class. In java, we can’t make Top level class static. Only nested classes can be static.
What are the differences between static and non-static nested classes?
Following are major differences between static nested class and non-static nested class. Non-static nested class is also called Inner Class.
Following are major differences between static nested class and non-static nested class. Non-static nested class is also called Inner Class.
1) Nested static class doesn’t need reference of Outer class, but Non-static nested class or Inner class requires Outer class reference.
2) Inner class(or non-static nested class) can access both static and non-static members of Outer class. A static class cannot access non-static members of the Outer class. It can access only static members of Outer class.
3) An instance of Inner class cannot be created without an instance of outer class and an Inner class can reference data and methods defined in Outer class in which it nests, so we don’t need to pass reference of an object to the constructor of the Inner class. For this reason Inner classes can make program simple and concise.
/* Java program to demonstrate how to implement static and non-static
classes in a java program. */
class OuterClass{
private static String msg = "GeeksForGeeks";
// Static nested class
public static class NestedStaticClass{
// Only static members of Outer class is directly accessible in nested
// static class
public void printMessage() {
// Try making 'message' a non-static variable, there will be
// compiler error
System.out.println("Message from nested static class: " + msg);
}
}
// non-static nested class - also called Inner class
public class InnerClass{
// Both static and non-static members of Outer class are accessible in
// this Inner class
public void display(){
System.out.println("Message from non-static nested class: "+ msg);
}
}
}
class Main
{
// How to create instance of static and non static nested class?
public static void main(String args[]){
// create instance of nested Static class
OuterClass.NestedStaticClass printer = new OuterClass.NestedStaticClass();
// call non static method of nested static class
printer.printMessage();
// In order to create instance of Inner class we need an Outer class
// instance. Let us create Outer class instance for creating
// non-static nested class
OuterClass outer = new OuterClass();
OuterClass.InnerClass inner = outer.new InnerClass();
// calling non-static method of Inner class
inner.display();
// we can also combine above steps in one step to create instance of
// Inner class
OuterClass.InnerClass innerObject = new OuterClass().new InnerClass();
// similarly we can now call Inner class method
innerObject.display();
}
}
Message from nested static class: GeeksForGeeks
Message from non-static nested class: GeeksForGeeks
Message from non-static nested class: GeeksForGeeks
For example, here's a service that provides clients with access to methods in the service through a Binder implementation: ( Örneğin, aşağıda Service class'ını extend eden LocalService isimli bir class tanımladık. Bu class'da inner class olarak Binder class'ını extend eden LocalBinder isimli bir class tanımladık, LocalBinder class'ında tanımlı getService() method'u outer class'ın instance'ını yani LocalService object return eder, artık client LocalService class'ının public method'larını örneğin getRandomNumber() method'unu çağırabilir. )
public class LocalService extends Service {

    // Binder given to clients

    private final IBinder mBinder = new LocalBinder();

    // Random number generator

    private final Random mGenerator = new Random();


    /**   Class used for the client Binder.  Because we know this service always runs in the same process as its clients, we don't need to deal with IPC.   */

    public class LocalBinder extends Binder {

        LocalService getService() {

// Return this instance of LocalService so clients can call public methods

            return LocalService.this;

        }

    }


    @Override

    public IBinder onBind(Intent intent) {

        return mBinder;

    }


    /** method for clients */

    public int getRandomNumber() {

      return mGenerator.nextInt(100);

    }

}
The
LocalBinder provides the getService() method for clients to retrieve the current instance of LocalService. This allows clients to call public methods in the service. For example, clients can call getRandomNumber() from the service. ( Yukarıda Service class'ını extend eden LocalService isimli bir class tanımladık. LocalService class'ında inner class olarak Binder class'ını extend eden LocalBinder isimli bir class tanımladık. LocalBinder class'ında getService() isimli bir method tanımlamak zorundayız, bu method outer class'ın instance'ını yani LocalService return eder, artık client'lar LocalService class'ında tanımlı method'ları çağırabilir. Örneğin, client, outer class olan LocalService class'ındaki getRandomNumber() method'unu çağırabilir. )
Here's an activity that binds to
LocalService and calls getRandomNumber() when a button is clicked: ( Yukarıda tanımladığımız LocalService isimli service class'ına bind olan bir activity class'ı tanımlayalım. Sonra activity'deki bir butona tıklayınca LocalService class'ının getRandomNumber() method'unun çağırılmasını sağlayalım. )
Aşağıdaki örneği inceleyelim. Activity class'ında ServiceConnection isimli default class'dan anonymously object yaratacağız, bu class'da 2 tane method tanımlayacağız :
- onServiceConnected()
- onServiceDisconnected()
onServiceConnected() method'unun aldığı 2. argument IBinder object'dir. Bu argument'i kendi tanımladığımız LocalService class'ındaki inner class olan LocalBinder class'a cast ederiz:
LocalBinder binder = (LocalBinder) service;
Sonra LocalBinder object'in getService() method'unu çağırarak LocalService object elde ederiz, bu object'i kullanarak yukarıda tanımladığımız LocalService class'ının public method'larını çağırabiliriz. Activity class'ının başında bir LocalService reference variable declare etmiştik. En son mBound isimli boolean variable'ı true olarak set ederiz, bu variable activity'nin service'e bound edilip edilmediğini gösterir, onServiceConnected() method'u çağırılınca mBound true olarak set edilir, onServiceDisconnected() method'u çağırılınca mBound false olarak set edilir.
LocalService mService;
mService = binder.getService();
mBound = true;
mBound = true;
/** Defines callbacks for service binding, passed to bindService() */

   private ServiceConnection mConnection = new ServiceConnection()
   {

        @Override

        public void onServiceConnected(ComponentName className, IBinder service )
       {

              // We've bound to LocalService, cast the IBinder and get LocalService instance

            LocalBinder binder = (LocalBinder) service;

            mService = binder.getService();

            mBound = true;

        }


        @Override

        public void onServiceDisconnected(ComponentName arg0)
       {

            mBound = false;

        }

   };
mBound isimli variable, Activity class'ının scope'unda declare edilir. Activity class'Inda Service connection class'ından anonymously bir object yaratılır, bu class'ın onServiceConnected() ve onServiceDisconnected() method'larında mBound variable true/false olarak set edilir.
Activity class'ının onStop() method'unda, mBound variable'ın true mu false mu olduğuna bakılır, true ise yani activity service'e bind olmuşsa, yani activity service'e bağlanmışsa unbindService(mConnection); method'u çağırılarak binding sonlandırılır ve mBound variable da false olarak set edilir. mConnection reference variable, ServiceConnection object'e refer eden bir reference variable'dır.
Ekrana bir buton koyduk, bu butona tıklayınca, mBound variable'ın true mu false mu olduğuna bakılır, true ise yani activity service'e bind olmuşsa(bağlıysa) bağlı olan service'in getRandomNumber() method'u çağırılır. Peki bu nasıl çağırılır? ServiceConnection class'ından yarattığımız object'in onServiceConnected() method'unda elde edilen LocalService object'e refer eden mService isimli variable kullanılarak. getRandomNumber() method'unun return ettiği integer'ı ekranda bir toast mesajıyla gösteririz.
onCreate() method'unda layout'u set ederiz.
onStart() method'unda bir intent object yaratıp bu intent object'i bindService() method'una 1. argument olarak veririz. bindService() method'una 2.argument olarak ServiceConnection class'ından yarattığımız object'e refer eden mConnection isimli reference variable'ı veririz. activity'nin service'e bind olması bindService() method'u çağırılınca gerçekleşir.
public class BindingActivity extends Activity {

    LocalService mService;

    boolean mBound = false;


    @Override

    protected void onCreate(Bundle savedInstanceState) {

        super.onCreate(savedInstanceState);

        setContentView(R.layout.main);

    }


    @Override

    protected void onStart() {

        super.onStart();

        // Bind to LocalService

        Intent intent = new Intent(this, LocalService.class);

        bindService(intent, mConnection, Context.BIND_AUTO_CREATE);

    }


    @Override

    protected void onStop() {

        super.onStop();

        // Unbind from the service

        if (mBound) {

            unbindService(mConnection);

            mBound = false;

        }

    }


/** Called when a button is clicked (the button in the layout file attaches to this method with the android:onClick attribute) */

    public void onButtonClick(View v) {

        if (mBound) {

/* Call a method from the LocalService. However, if this call were something that might hang, then this request should occur in a separate thread to avoid slowing down the activity performance.  */

            int num = mService.getRandomNumber();

            Toast.makeText(this, "number: " + num, Toast.LENGTH_SHORT).show();

        }

    }


 /** Defines callbacks for service binding, passed to bindService() */

   private ServiceConnection mConnection = new ServiceConnection()
   {

        @Override

        public void onServiceConnected(ComponentName className, IBinder service)
       {

              // We've bound to LocalService, cast the IBinder and get LocalService instance

            LocalBinder binder = (LocalBinder) service;

            mService = binder.getService();

            mBound = true;

        }


        @Override

        public void onServiceDisconnected(ComponentName arg0)
       {

            mBound = false;

        }

   };

}
The above sample shows how the client binds to the service using an implementation of ServiceConnection and the onServiceConnected() callback. The next section provides more information about this process of binding to the service. ( Yukarıda örnekte, ServiceConnection class'ının implementation'ı ve onServiceConnected() method'u kullanılarak bir client'ın service'e bind olmasını sağlar. Sonraki section, service'e bind edilme işlemi hakkında daha fazla bilgi sağlar. )
To bind and unbind service from main thread of activity we call bindService() and unbindService() respectively. ( Activity'nin Service'e bind/unbind olması için activity class'ından bindService() ve unbindService() method'larını çağırırız. )
Our service should be configured in AndroidManifest.xml within application tag:
Our service should be configured in AndroidManifest.xml within application tag:
<service android:name=".MyLocalService"/>
Note: In the example above, the onStop() method unbinds the client from the service. Clients should unbind from services at appropriate times, as discussed in Additional notes.( Activity'nin onStop() method'u çalıştığında yani activity ekrandan kaybolduğunda unbindService() method'u çağırılarak client service'den unbind edilir: )
if (mBound) {
unbindService(mConnection);
mBound = false;
}
unbindService(mConnection);
mBound = false;
}
Client'ların service'den doğru zamanda unbind etmesi çok önemlidir.
Bu kodun tamamı aşağıda gösterilmiştir. 13_Local_Bound_Service_3 projesine de bakabilirsin.
LocalService.java
LocalService.java
public class LocalService extends Service {
    private final IBinder mBinder = new LocalBinder();

    // Random number generator

    private final Random mGenerator = new Random();


    /**   Class used for the client Binder.  Because we know this service always runs in the same process as its clients, we don't need to deal with IPC.  */

    public class LocalBinder extends Binder {

        LocalService getService() {

// Return this instance of LocalService so clients can call public methods

            return LocalService.this;

        }

    }


    @Override

    public IBinder onBind(Intent intent) {

        return mBinder;

    }


    /** method for clients, client'ların cagirabilecegi bir method*/

    public int getRandomNumber() {

        return mGenerator.nextInt(100);

    }

}
BindingActivity.java
public class BindingActivity extends Activity {

    LocalService mService;

    boolean mBound = false;


    @Override

    protected void onCreate(Bundle savedInstanceState) {

        super.onCreate(savedInstanceState);

        setContentView(R.layout.main);

    }


    @Override

    protected void onStart() {

        super.onStart();

        // Bind to LocalService

        Intent intent = new Intent(this, LocalService.class);

        bindService(intent, mConnection, Context.BIND_AUTO_CREATE);

    }


    @Override

    protected void onStop() {

        super.onStop();

        // Unbind from the service

        if (mBound) {

            unbindService(mConnection);

            mBound = false;

        }

    }


    public void onButtonClick(View v) {

        if (mBound) {

            int num = mService.getRandomNumber();

            Toast.makeText(this, "number: " + num, Toast.LENGTH_SHORT).show();

        }

    }


    /** Defines callbacks for service binding, passed to bindService() */

    private ServiceConnection mConnection = new ServiceConnection()

    {

        @Override

        public void onServiceConnected(ComponentName className, IBinder service)

        {

            // We've bound to LocalService, cast the IBinder and get LocalService instance

            LocalService.LocalBinder binder = (LocalService.LocalBinder) service;

            mService = binder.getService();

            mBound = true;

        }


        @Override

        public void onServiceDisconnected(ComponentName arg0)

        {

            mBound = false;

        }

    };

}
main.xml
<?xml version="1.0" encoding="utf-8"?>

<RelativeLayout  android:id="@+id/main">


    <TextView

        android:layout_width="wrap_content"

        android:layout_height="wrap_content"

        android:text="Hello World!" />


    <Button

        android:id="@+id/btn_date"

        android:layout_width="fill_parent"

        android:layout_height="wrap_content"

        android:text="@string/btn_msg"

        android:onClick="onButtonClick"

        android:layout_marginTop="10mm"/>


</RelativeLayout>
AndroidManifest.xml
<application
android:label="@string/app_name"
<activity android:name=".BindingActivity">
<intent-filter>
<action android:name="android.intent.action.MAIN" />
<category android:name="android.intent.category.LAUNCHER" />
</intent-filter>
</activity>
<service android:name=".LocalService"/>
</application>
Output : A bound service is a service which allows other applications to bind and interact with it. This is the implementation of Service where we have to override onBind() that will return IBinder. ( Service class'ının onBind() method'unu override etmek zorundayız. Service class'ında Binder class'ını extend eden bir inner class tanımlamalıyız:
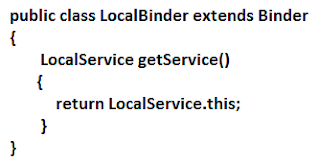 Service class'ında LocalBinder inner class'ından bir object yaratırız:
private final IBinder mBinder = new LocalBinder();
Service class'ında LocalBinder inner class'ından bir object yaratırız:
private final IBinder mBinder = new LocalBinder();ServiceConnection instance created for service. ( bindService() method'una argument olarak intent object ve ServiceConnection object verilir. )public void onServiceConnected(ComponentName className, IBinder service)
{
// We've bound to LocalService, cast the IBinder and get LocalService instance
LocalService.LocalBinder binder = (LocalService.LocalBinder) service;
mService = binder.getService();
mBound = true;
}
@Override
public void onServiceDisconnected(ComponentName arg0)
{
mBound = false;
}
android.os.Binder implements android.os.IBinder. If our client and service are in same application, we can implement our own Binder. To use it we can create public inner class which will extend Binder within our service and finally return the instance of this inner class by onBind() method. Extending Binder works if our service is private to our application that is known as local binding. (Binder class'ı I Binder interface'i implement eder. Client ve service aynı uygulamadaysa, kendi Binder class'ımızı implement edebiliriz. Tanımladığımız bound service class'ımızda Binder class'ını extend eden bir inner class tanımlarız. Bu class'dan bir object yaratıp, bu object'i onBind() method'unda return ederiz. Eğer service'imiz sadece aynı uygulama içerisinde kullanılacaksa geçerlidir Binder class'ını extend etmek yöntemi. )
Example - 13_Local_Bound_Service_4
http://www.truiton.com/2014/11/bound-service-example-android/#comment-12306 While working with Android services, there comes a situation where we would want the service to communicate with an activity. To accomplish this task one has to bind a service to an activity, this type of service is called an android bound service. After a service is bound to an activity one can return the results back to the calling activity. Here in this tutorial I would start a timer service which would keep counting a timer from the start of service. Then I will bind this service to the same activity, which would make this a bound service. Why I started a service and then bind it?
Service'ler hakkındaki dersin tamamını şu link'teki pdf'ten okuyabilirsiniz :
https://drive.google.com/open?id=1xjFPZtO6F4rdBb7GaI8gXcOXbYwQh52R
While working with Android services, there comes a situation where we would want the service to communicate with an activity. To accomplish this task one has to bind a service to an activity, this type of service is called an android bound service. After a service is bound to an activity one can return the results back to the calling activity. Here in this tutorial I would start a timer service which would keep counting a timer from the start of service. Then I will bind this service to the same activity, which would make this a bound service. Why I started a service and then bind it?
Service'ler hakkındaki dersin tamamını şu link'teki pdf'ten okuyabilirsiniz :
https://drive.google.com/open?id=1xjFPZtO6F4rdBb7GaI8gXcOXbYwQh52R


Hiç yorum yok:
Yorum Gönder